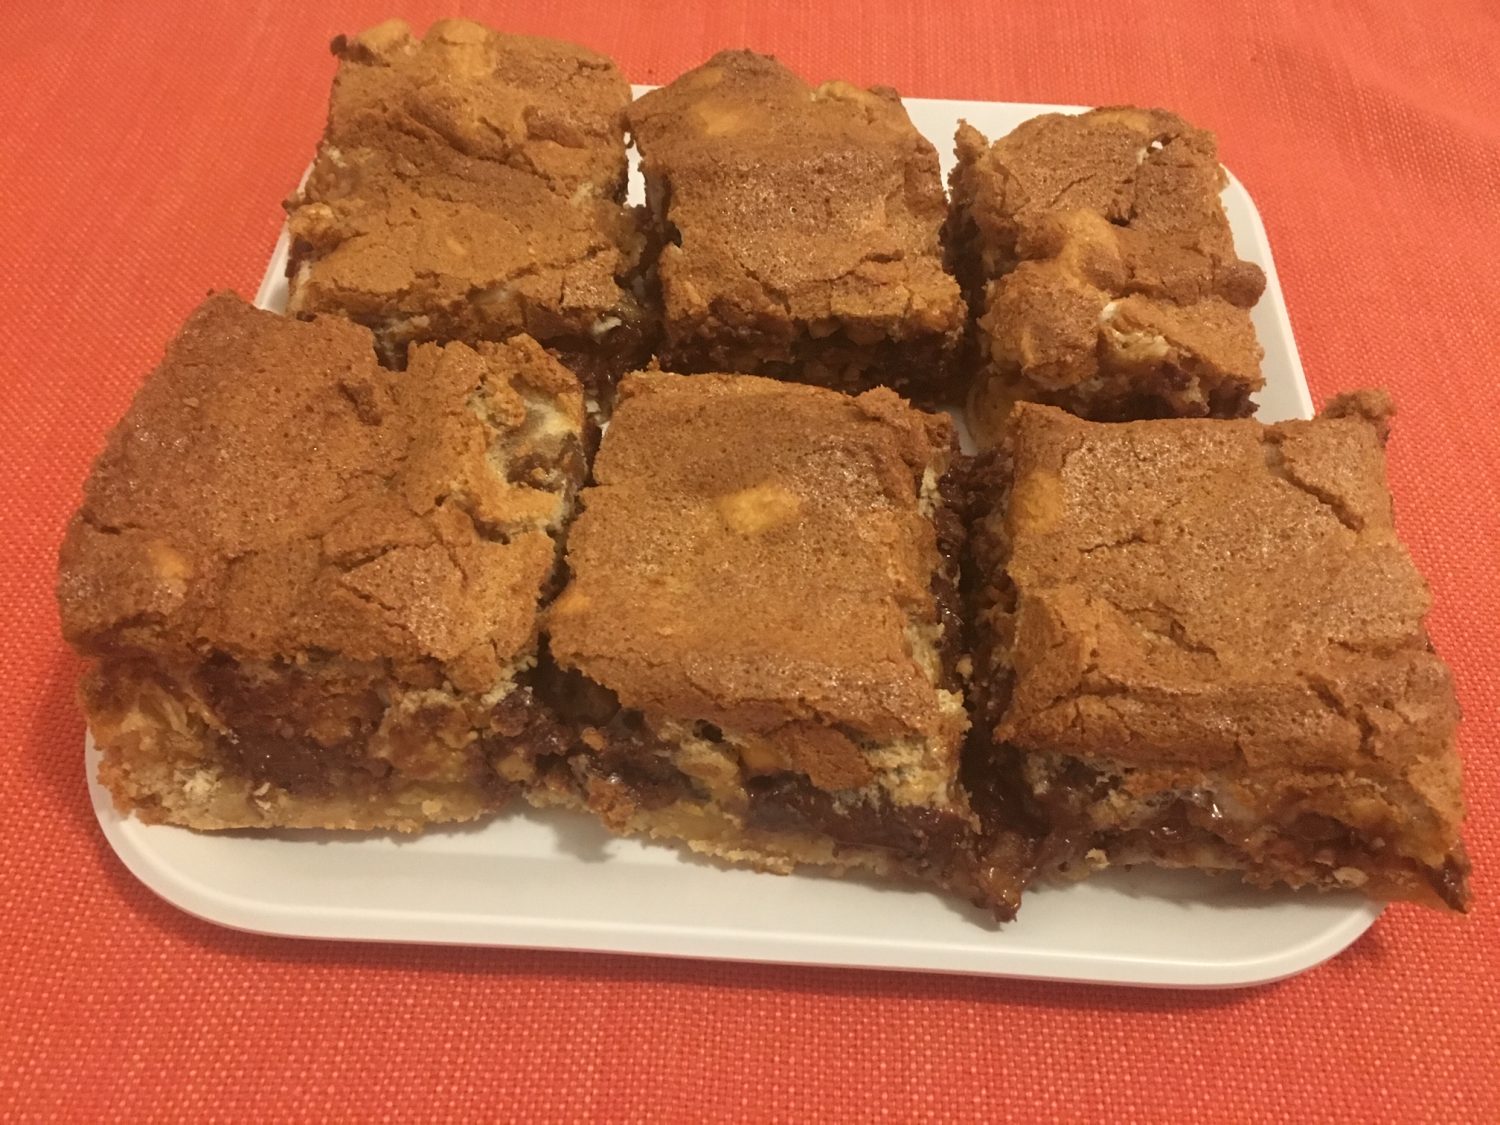
Posts

Mud Hen Crunch Bars

Mud Hen Crunch Bars

Print
clock clock iconcutlery cutlery iconflag flag iconfolder folder iconinstagram instagram iconpinterest pinterest iconfacebook facebook iconprint print iconsquares squares iconheart heart iconheart solid heart solid icon
Mud Hen Crunch Bars

Mud Hen Crunch Bars

  • Author: Cherie | Taste & Review
  • Prep Time: 10 min
  • Cook Time: 40 min
  • Total Time: 50 min

Ingredients

Scale

1 tablespoon Crisco All-Vegetable Shortening

1 cup butter

1 cup sugar

5 eggs

1 1/2 cups flour

1 teaspoon baking powder

1/4 teaspoon salt

1 cup ripple potato chips, crushed

1 cup pretzel sticks, crushed

1 1/2 cup mini marshmallows

3/4 cup semi-sweet chocolate chips

3/4 cup butterscotch baking chips

1 cup light brown sugar, packed


Instructions

Preheat the oven to 355ºF. Grease a 9 by 13 inch pan with Crisco.

For this recipe you will need 2 medium size bowl or use a mixing bowl. One for the bottom layer and the second bowl will be for the top layer.

In a medium size mixing bowl combine the butter and sugar. Beat it till it is creamed together.

Add 1 whole egg and 2 egg yolks. Beat the mixture till the eggs well combined.

Add flour, baking powder, and salt.   Beat the mixture for another 2 minutes. Then spread the mixture in the greased pan. The dough will be sticky. Use a butter knife to smooth and level it out in the pan.

Put the crushed ripple potato chips, crushed pretzel sticks on the next layer. Use a fork to spread it even and push into the dough.

Then sprinkle on the chocolate chips, butterscotch chips, and mini marshmallows. Keep chips and marshmallows away from the edge of pan.

For the last layer you will need another medium size bowl. Beat 4 egg whites until stuff. Add the brown sugar. Then using a spatula to spread the brown sugar meringue mixture on top.

Bake at 350ºF for 40 minutes. Allow to cool completely before cutting into squares. Store airtight at room temperature for up to 3 days.


Nutrition

  • Serving Size: 12-24
  • Calories: 342
  • Sugar: 24.3g
  • Sodium: 282mg
  • Fat: 17g
  • Saturated Fat: 9.3g
  • Carbohydrates: 43.2g
  • Fiber: 1g
  • Protein: 4.8g
  • Cholesterol: 56mg
Baked Spaghetti

Baked Spaghetti

Print
clock clock iconcutlery cutlery iconflag flag iconfolder folder iconinstagram instagram iconpinterest pinterest iconfacebook facebook iconprint print iconsquares squares iconheart heart iconheart solid heart solid icon
Baked Spaghetti

Baked Spaghetti

  • Author: Bryon | Taste & Review
  • Prep Time: 25 min
  • Cook Time: 40 min
  • Total Time: 65 min

Ingredients

Scale

1 pound ground beef

1 (24 ounce) jar spaghetti sauce

1 bag (6 ounce) pepperoni slices

4 large eggs

2/3 cup grated fresh parmesan cheese

1 medium onion, diced

1 bell pepper, diced

3 cloves garlic, minced

12 ounce spaghetti noodles, cooked according to package directions

2 tablespoons butter, softened

2 cups Ricotta cheese

6 slices mozzarella cheese

1 (8 ounce) bag Italian shredded cheese

Chopped fresh parsley for garnish


Instructions

Preheat oven to 350° F. Grease a 9 x 13-inch baking dish.

Cook the spaghetti noodles according to the package until al dente, drain, and set aside.

On a cutting board dice the onion and pepper. Then mince the garlic.

In a large skillet, cook the ground beef, onion, and bell pepper over medium-high heat until meat is browned and crumbly; drain the grease. Stir in the spaghetti sauce and pepperoni slices.

In a large bowl, whisk together eggs and parmesan. Stir in the cooked spaghetti noodles and butter until well combined. Poor half the spaghetti noodle mixture into the prepared baking dish.

Spread the half the Ricotta cheese onto the spaghetti mixture. Then spread half the meat sauce on top of the Ricotta. Repeat the layers and top the dish with mozzarella slices. Cover with aluminum foil.

Bake for 30 minutes then take the dish out and remove the foil. Spread the Italian shredded cheese evenly on top. Cook till hot and bubbly about 10 minutes. Cheese will be slightly brown when done. Let the dish stand and cool for 10 minutes before serving. Garnish with chopped fresh parsley.


Nutrition

  • Serving Size: 8
  • Calories: 721
  • Sugar: 15.8g
  • Sodium: 2438mg
  • Fat: 28.5g
  • Saturated Fat: 14.3g
  • Carbohydrates: 63.2g
  • Fiber: 0.6g
  • Protein: 52.6g
  • Cholesterol: 235mg
Low Carb Carrot Cake Cupcakes

Low Carb Carrot Cake Cupcakes

Print
clock clock iconcutlery cutlery iconflag flag iconfolder folder iconinstagram instagram iconpinterest pinterest iconfacebook facebook iconprint print iconsquares squares iconheart heart iconheart solid heart solid icon
Low Carb Carrot Cake Cupcakes

Low Carb Carrot Cake Cupcakes

  • Author: Cherie | Taste & Review
  • Prep Time: 15 min
  • Cook Time: 20 min
  • Total Time: 35 min

Ingredients

Scale

Carrot Cake Cupcakes Ingredients:

¼ cup Swerve granular

½ cup Swerve brown sugar replacement

¾ cup butter, unsalted (room temperature)

1 teaspoon vanilla extract

4 large eggs

2 ½ cups, Finely ground almond flour

2 teaspoons baking powder

2 teaspoons ground cinnamon

¼ teaspoon ground nutmeg

6 ounces shredded carrot

1 cup unsweetened coconut flakes

2 cups pecans chopped

Cream Cheese Frosting Ingredients:

8 ounce cream cheese (room temperature)

½ cup butter, unsalted (room temperature)

1 teaspoon vanilla extract

½ teaspoon cinnamon

¼ teaspoon salt

3 ½ cups Swerve confectioners


Instructions

Preparation:

For this recipe the cream cheese and unsalted butter need to be at room temperature.

Set them both aside and let them get to room temperature before preparing the recipe.

You can also take the pecans and chop them up and set them aside as well.

Make The Carrot Cake Cupcakes:

Preheat oven to 350ºF degrees. Line your cupcake pans with cupcake paper liners. This recipe make 18 cupcakes. 

In a mixing bowl combine the Swerve granular, Swerve brown sugar replacement, and unsalted butter. Beat them together till it is creamed and well combined.

Add vanilla extract, and eggs. Keep beating the mixture till combined.

In a separate medium size bowl add the ground almond flour, baking powder, cinnamon, and nutmeg.

Take a fork and mix the dry ingredients till they are well combined.

Gradually add the dry ingredients to the wet mixture and beat it slowly till everything is combined.

Fold in the shredded carrots, unsweetened coconut flakes, and 1 ½ cups of pecans.

Reserve the remaining ½ cup pecans for decorating on top of the cupcakes.

Evenly divide the batter between the muffin liners. Each carrot cake cupcake batter should be just below the top of the cupcake liner.

Place the cupcakes in the oven and bake for 20-25 minutes or until a toothpick comes out clean inserted in the center.

Cool cupcakes for an hour before frosting and decorating them.

Make The Cream Cheese Frosting:

In a mixing bowl add the cream cheese and butter. Whip together till fluffy and creamy. Then add the vanilla extract, cinnamon, salt, and Swerve confectioners. Keep beating till it is well combined.

Decorate The Carrot Cake Cupcakes:

Use a butter knife to frost the cupcakes. Place the remaining pecans and decorate around the edges on top of the frosting. To make it look more fancy you can always pipe up the frosting.


Notes

This recipe makes extra frosting than needed. For best results have the cream cheese and unsalted butter at room temperature. 


Nutrition

  • Serving Size: 18
  • Calories: 338
  • Sugar: 35g
  • Fat: 34.3g
  • Saturated Fat: 16.2g
  • Carbohydrates: 8g
  • Fiber: 2g
  • Protein: 7g
  • Cholesterol: 92mg
Easter Bunny Cake

Easter Bunny Cake

Print
clock clock iconcutlery cutlery iconflag flag iconfolder folder iconinstagram instagram iconpinterest pinterest iconfacebook facebook iconprint print iconsquares squares iconheart heart iconheart solid heart solid icon
Easter Bunny Cake

Easter Bunny Cake

  • Author: Sue | Taste & Review

Ingredients

Scale

1 box cake mix ( use your favorite boxed recipe)

2 containers white buttercream frosting

2 bags sweetened coconut flakes (14 oz)

Red food coloring

Green food coloring

Jelly beans

Red licorice

Cadbury mini eggs


Instructions

Make The Cake:

Bake the cake according to the directions on the box using 9-inch baking pans.

Allow cakes to cool completely, about 1 hour.  Then remove the cake from the pans.

Decorate The Bunny:

Place one cake round on the serving tray. This will be the bunny head.

Take the other cake to make the ears and bowtie. Cut the cake with a knife. Follow the diagram below the recipe.  Cut out the bowtie. The middle piece will be the bowtie and the other two pieces will be for the bunny ears.

Place the ears and bowtie onto the serving tray.

Take one of the frosting containers and frost the cake with a knife carefully for the face and ears only, as the bowtie will be pink colored.

Take the other frosting container and put a few drops of the red food coloring until you reach the color you desire. Frost in bowtie pink and inside of the bunny ear.

Sprinkle the sweetened coconut flakes on the bunny face and ears. Avoid the inside where the frosting is pink.

Decorate the bunny face using the licorice for whiskers and the Cadbury chocolate for the eyes. Use a black jelly bean for the mouth.

Use jelly beans to outline the bowtie and fill in the middle of the bowtie.

Make The Grass Around The Bunny:

Use a large ziplock bag or a large bowl to mix the green food coloring until you reach the desired green color. Sprinkle the green coconut around the bunny.

Store the bunny cake at room temperature.


Notes

 The possibilities are endless with the way you can decorate the cake! 


Nutrition

  • Serving Size: 12
  • Calories: 457
  • Sugar: 48g
  • Sodium: 362mg
  • Fat: 19.6g
  • Saturated Fat: 9.0g
  • Carbohydrates: 68.8g
  • Fiber: 2.7g
  • Protein: 2.8g
  • Cholesterol: < 1mg


Broccoli Casserole

Broccoli Casserole

Print
clock clock iconcutlery cutlery iconflag flag iconfolder folder iconinstagram instagram iconpinterest pinterest iconfacebook facebook iconprint print iconsquares squares iconheart heart iconheart solid heart solid icon
Broccoli Casserole

Broccoli Casserole

  • Author: Cherie | Taste & Review
  • Prep Time: 15 min
  • Cook Time: 35 min
  • Total Time: 50 min

Ingredients

Scale

2 x (12 ounces) broccoli florets, cut into small pieces

1/2 yellow onion, diced

4 tablespoons unsalted butter, melted

10.5 ounces condensed cream of mushroom soup

3/4 cup mayonnaise

2 large eggs

3 cups taco shredded cheese

1/2 teaspoon salt

1/4 teaspoon coarse ground black pepper

3.5 ounces crispy fried onions

1 cup round butter crackers, finely crushed


Instructions

Preheat oven to 350ºF.

Thaw out the frozen broccoli overnight. On a cutting board chop up the thawed broccoli florets into smaller pieces. There should be a variety of smaller chunks of and tiny ones.  Then dice half of a yellow onion. Set Aside.

In a large mixing bowl beat the 2 eggs. Then combine the melted butter, cream of mushroom soup, mayonnaise, salt, and pepper until well combined to make the sauce.  

Stir in the crispy fried onions and 2 cups of the taco shredded cheese, reserving 1 cup left to put on top later.

Pour the broccoli casserole batter into a 9 x 13 inch backing dish. Top with remaining 1 cup of the taco shredded cheese and finely crushed crackers.

Bake for 30 minutes uncovered or until top is golden.  Allow time to cool before serving.


Nutrition

  • Serving Size: 10
  • Calories: 301
  • Sugar: 3.3g
  • Sodium: 668mg
  • Fat: 21.7g
  • Saturated Fat: 6.9g
  • Carbohydrates: 21.9g
  • Fiber: 2.5g
  • Protein: 6.8g
  • Cholesterol: 61mg
Keto Poblano Cheddar Muffins

Keto Poblano Cheddar Muffins

Print
clock clock iconcutlery cutlery iconflag flag iconfolder folder iconinstagram instagram iconpinterest pinterest iconfacebook facebook iconprint print iconsquares squares iconheart heart iconheart solid heart solid icon
Keto Poblano Cheddar Muffins

Keto Poblano Cheddar Muffins

  • Author: Cherie | Taste & Review
  • Prep Time: 15 min
  • Cook Time: 30min
  • Total Time: 45min

Ingredients

Scale

2 cups riced, raw cauliflower

1 poblano pepper minced

2 large eggs, beaten

2 tablespoons melted butter

2 tablespoons butter or ghee, grease muffin pan

1/3 cup grated parmesan cheese

1 cup grated mozzarella cheese

1 cup grated cheddar cheese

1 tablespoon dried onion flakes

1/4 teaspoon salt

1/4 teaspoon black pepper

1/2 teaspoon garlic powder

1/2 teaspoon baking powder

2 teaspoon dried chives

1/4 cup coconut flour


Instructions

Preheat oven to 350°F. 

Grease a muffin pan with butter or ghee and set aside.

In a large bowl beat 2 eggs. Add 2 tablespoons of melted butter.

Rice the cauliflower with a box grater or food processor. If using the box grater use the medium-sized holes to grate the cauliflower into a rice like texture. Then add the rice cauliflower to the big bowl.

On a cutting board mince the poblano pepper and then add to the big bowl.

Then add the grated parmesan cheese, mozzarella cheese, cheddar cheese, dried onion flakes, salt, black pepper, garlic powder, baking powder, dried chives, and coconut flour. 

Stir till everything is well combined.

Use a spatula and divide the batter into the 12 greased muffin cups.

Bake the poblano cheddar muffins for 30 minutes or until they are golden brown.

Let the muffins cool for one hour before taking out of pan or serving.


Notes

Wear plastic gloves if you have sensitive skin when cutting the poblano pepper. Leftovers can be in the refrigerator for up to one week or three months in the freezer. Don’t use muffin/cupcake liners as they will stick to the paper.


Nutrition

  • Serving Size: 12
  • Calories: 135
  • Sugar: .7g
  • Sodium: 221mg
  • Fat: 9.7g
  • Saturated Fat: 5.9g
  • Carbohydrates: 5.4g
  • Fiber: 2.7g
  • Protein: 6.6g
  • Cholesterol: 56mg
Low Carb Chicken Kiev

Low Carb Chicken Kiev

Print
clock clock iconcutlery cutlery iconflag flag iconfolder folder iconinstagram instagram iconpinterest pinterest iconfacebook facebook iconprint print iconsquares squares iconheart heart iconheart solid heart solid icon
Low Carb Chicken Kiev

Low Carb Chicken Kiev

  • Author: Bryon | Taste & Review
  • Prep Time: 30
  • Total Time: 50

Ingredients

Scale
  • 6 large (8-oz) boneless skinless chicken breasts
  • Avocado oil for frying

Herb Butter filling

  • 9 tablespoon butter, room temperature
  • 6 garlic cloves, minced
  • 1 tablespoon fresh chives, minced
  • 1 tablespoon tarragon
  • 1 tablespoon fresh parsley, plus more for garnish
  • 1/2 teaspoon salt

Breading

  • 3/4 cup almond flour
  • 3/4 cup coconut flour
  • 3.25 oz pork rinds, crumbled
  • 2 eggs

Instructions

Prepare The Herb Garlic Butter Filling

  1. In a small bowl mix together with a fork the butter, minced cloves, mined chives, tarragon, fresh parsley, and salt. Cover and put in freezer for 30 minutes.

Prepare The Chicken

  1. Flatten each chicken breast using plastic wrap on top of each breast. Take a meat mallet and pound it till all the pieces are of the same even thickness. Make sure it is going to be thin enough so later on when you add a filling to it you will be able to wrap it. When the butter has chilled for half hour take it out. Take out plastic wrap and place the pounded chicken breast on it. Then use a tablespoon to scoop out the herb garlic butter filling and place in the middle of the chicken. Use more or less needed depending on each size of the chicken breast. Fold all the chicken to the center. Then take the plastic wrap gather it and cover it. Make sure it is nice and tight. Twist the plastic wrap at the top. It will look like a giant teardrop. Then repeat this pattern till all the chicken is done. Place on a plate and put in the freezer for 40 minutes. Chicken will cold but not frozen. You can prepare the breading while it is in the freezer.

Bread The Chicken Kiev

  1. After the chicken has been in the freezer for 40 minutes take it out. Take a small bowl and 2 medium size bowls out. Place the 2 eggs in the small bowl and beat the eggs. In a medium size bowl add the almond flour and coconut flour. Use a fork and mix the flours till well combined. In another medium size bowl add the crushed pork rinds.
  2. Dip chicken in almond and coconut flour mixture first. Then dip in the beaten eggs followed by dipping it into the crushed pork rinds. Place all the breaded chicken on a plate. Freeze for 15 min before frying.

Cook The Chicken Kiev

  1. Heat up your oil for frying in a deep fryer and follow the manufacturer’s instructions for how much oil to add. We used avocado oil for this recipe. Make sure you don’t fill it to the top so you don’t get hurt. You can also preheat the oven at this time to 400º F and line a baking sheet with parchment paper.
  2. When the deep fryer is up to temperature and the chicken has been chilled for 15 minutes you can now fry it about 1-2 minutes or until lightly golden. Take the chicken out and place on the lined baking sheet. Repeat this till all the chicken has been deep fried.
  3. Put the chicken in the oven and cook for 15 minutes or until golden brown. Let it cool for 5 minutes before serving. Sprinkle fresh parsley on top for garnish.

Notes

  • This recipe is time consuming but worth the effort! Great for a date night of cooking together on the weekend.

Nutrition

  • Serving Size: 6
  • Calories: 489
  • Sugar: 0
  • Sodium: 263
  • Fat: 36
  • Saturated Fat: 14
  • Unsaturated Fat: 19
  • Trans Fat: 1
  • Carbohydrates: 22
  • Protein: 22
  • Cholesterol: 153
Low Carb Mini Raspberry Cheesecakes

Low Carb Raspberry Swirled Cheesecakes

Print
clock clock iconcutlery cutlery iconflag flag iconfolder folder iconinstagram instagram iconpinterest pinterest iconfacebook facebook iconprint print iconsquares squares iconheart heart iconheart solid heart solid icon
Low Carb Raspberry swirled Cheesecakes

Low Carb Raspberry Swirled Cheesecakes

  • Author: Cherie | Taste & Review
  • Prep Time: 20
  • Cook Time: 20
  • Total Time: 40

Ingredients

Scale

Crust Layer

  • 1 1/2 cups bob’s red Mill superfine natural almond flour from whole almonds
  • 6 tablespoons butter ( 1 stick)
  • 1/2 teaspoon cinnamon
  • 1/2 tablespoon Swerve granular sugar

Cheesecake Layer

  • 3 (8 oz) cream cheese, room temperature
  • 3 large eggs
  • 1 1/2 teaspoon vanilla extract
  • 1 1/2 teaspoon lemon juice
  • 1/4 teaspoon Himalayan salt
  • 3/4 cup Swerve granular sugar
  • 3/4 cup sugar-free red raspberry preserves
  • 48 fresh raspberries

Instructions

To Make The Crust Layer

  1. Preheat the oven to 350°F. Line your muffin pan with cupcake liners. This will make 3 dozen or
  2. 48 cheesecakes.
  3. Melt the one stick of butter in a microwave bowl till it is completed melted.
  4. Transfer the melted butter to a medium size bowl. Then add in the almond flour, cinnamon, and Swerve granular sugar.
  5. Use a fork and stir till well combined.
  6. Take a teaspoon and scoop out the crust mixture and press it into the bottom of a muffin tin. Repeat this till all the muffin tins have the crust mixture in them.
  7. Bake in the oven for 5 minutes. The crust layers should be slight brown at this moment and crispy. Let them cool off while you make the cheese cake batter.

To Make The Cheescake Layer

  1. Beat the cream cheese with an electric hand mixer or standing mixer until it is creamy.
  2. Add in the vanilla extract, lemon, eggs, salt, and Swerve granular sugar. Beat until mixture is combined.
  3. Divide mixture evenly among cups over almond crust layer. Each should be fill about ¾ of the way up to reserve room for when it rises in the oven.
  4. Use a teaspoon of sugar-free red raspberry preserves and place on each cheesecake. Keep going till
  5. all the cheesecakes have the jam on top. Then use a tooth pick or fork and swirl it in the batter to create a marble effect.
  6. Bake in the oven at 350°F for 15 minutes. The raspberry cheesecakes will be slightly wiggly. Let them cool in refrigerator for 24 hours.
  7. Place one raspberry on each cheesecake to decorate before serving.


Nutrition

  • Serving Size: 48
  • Calories: 113
  • Sugar: 6
  • Sodium: 64
  • Fat: 8
  • Saturated Fat: 4
  • Unsaturated Fat: 3
  • Trans Fat: 0
  • Carbohydrates: 10
  • Protein: 2
  • Cholesterol: 31
Low Carb Pumpkin Cream Pie Cookies

Low Carb Pumpkin Cream Pie Cookies

Print
clock clock iconcutlery cutlery iconflag flag iconfolder folder iconinstagram instagram iconpinterest pinterest iconfacebook facebook iconprint print iconsquares squares iconheart heart iconheart solid heart solid icon
Low Carb Pumpkin Cream Pie Cookies

Low Carb Pumpkin Cream Pie Cookies

  • Author: Cherie | Taste & Review
  • Prep Time: 20
  • Cook Time: 15
  • Total Time: 180

Ingredients

Scale

For The Cookie

  • 1/2 cup butter (1 stick), softened
  • 2/3 cup Splenda brown sugar blend
  • 1/3 cup Swerve, The Ultimate Sugar Replacement, Granular
  • 2 Large eggs
  • 1 cup Libby 100% pure pumpkin
  • 1 1/2 cup almond flour
  • 2 teaspoon baking powder
  • 1 teaspoon salt
  • 2 teaspoon ground cinnamon
  • 1/2 teaspoon nutmeg
  • 1/4 teaspoon ground ginger
  • 1/4 teaspoon ground clove

For The Cream Filling

  • 1/2 cup butter (1 stick), softened
  • 1 (8 oz) cream cheese, softened
  • 1 2/3 cup Swerve, The Ultimate Sugar Replacement – Confectioners
  • 1 teaspoon vanilla extract
  • 1 teaspoon ground cinnamon
  • 1/4 cup Smucker’s sundae syrup sugar free caramel

Instructions

For The Pumpkin Cookies

  1. Preheat your oven to 350ºF.
  2. Line 3 baking trays with parchment paper
  3. Cream the butter, and the sugars in a mixer. Add in the 2 eggs and pumpkin. Mix well till is all combined.
  4. Then add in the almond flour, baking powder, salt, ground cinnamon, nutmeg, ground ginger, and ground clove. Mix for another 2 minutes.
  5. Set the mixing bowl with the pumpkin dough in the refrigerator and chill for an hour or overnight. While the dough is in the fridge you can make the cream filling.
  6. Take out the refrigerated dough after it has been chilled, and using teaspoon scoop out the pumpkin batter and place dough on the prepared parchment paper baking tray. Allow them plenty of space for the cookie to spread. It should make about 36 cookies or 3 dozen that will be used to make the cookies. 36 cookie halves to make up 18 total finished.
  7. Bake the cookies for 12-15 minutes.
  8. Cookies will be super soft so allow 30 minutes or more to cool before frosting them.

For The Cream Filling

  1. In a mixing bowl cream the butter, and cream cheese together. Then add the swerve sugar, vanilla extract, ground cinnamon, and caramel syrup. Mix until well combined.

To Assemble The Cookies

  1. Match up two cookies that are similar in size. Turn the bottoms over and using a knife to spread it on both halves. If desired you can pipe the filling on with a piping bag or a zip bag with the corner cut off. Add the top cookie and press down to make it sandwhiched.
  2. Place in a tupperware container and let them cool for 1 to 2 hours before serving.

Notes

  • Dough will be super soft and chewy. The key to this recipe is giving enough time for the cookies to cool before frosting and before serving.

Nutrition

  • Serving Size: 18
  • Calories: 302
  • Sugar: 26
  • Sodium: 185
  • Fat: 18
  • Saturated Fat: 10
  • Unsaturated Fat: 7
  • Trans Fat: 0
  • Carbohydrates: 34
  • Protein: 3
  • Cholesterol: 62
Keto Flourless Peanut Butter Cookies With Chocolate Chips

Keto Flourless Peanut Butter Cookies With Chocolate Chips

Print
clock clock iconcutlery cutlery iconflag flag iconfolder folder iconinstagram instagram iconpinterest pinterest iconfacebook facebook iconprint print iconsquares squares iconheart heart iconheart solid heart solid icon
Keto Flourless Peanut Butter Cookies With Chocolate Chips

Keto Flourless Peanut Butter Cookies With Chocolate Chips

  • Author: Cherie | Taste & Review
  • Prep Time: 15
  • Cook Time: 12
  • Total Time: 27

Ingredients

Scale
  • 16.3 oz (1 jar) natural peanut butter
  • 1 cup Truvia baking blend sugar
  • 2 eggs
  • 1 cup Lily’s dark chocolate chip

Instructions

  1. Preheat your oven to 350ºF.
  2. Line 2 baking trays with parchment paper.
  3. In a medium size bowl beat 2 eggs. Then combine the natural peanut butter and Truvia sugar.
  4. Use a teaspoon to scoop up the peanut butter dough and then use your hands to roll into 1-inch balls. Place the rolled balls onto the parchment lined cookie sheet. Cookies should be arranged about 2 inches apart. Repeat this till all the dough is used up.
  5. Take a fork to each ball of peanut butter dough and flatten each cookies by pressing down to create a pattern on each cookie.
  6. Sprinkle the Lily’s dark chocolate chips on top of all the cookies. Use your hands and press down on the chocolate chips into the cookies.
  7. Bake the cookies for 10 to 12 minutes or till lightly browned. Cool completely on wire rack.


Nutrition

  • Serving Size: 24
  • Calories: 209
  • Sugar: 14
  • Sodium: 101
  • Fat: 14
  • Saturated Fat: 4
  • Unsaturated Fat: 9
  • Trans Fat: 0
  • Carbohydrates: 18
  • Protein: 6
  • Cholesterol: 16