Posts

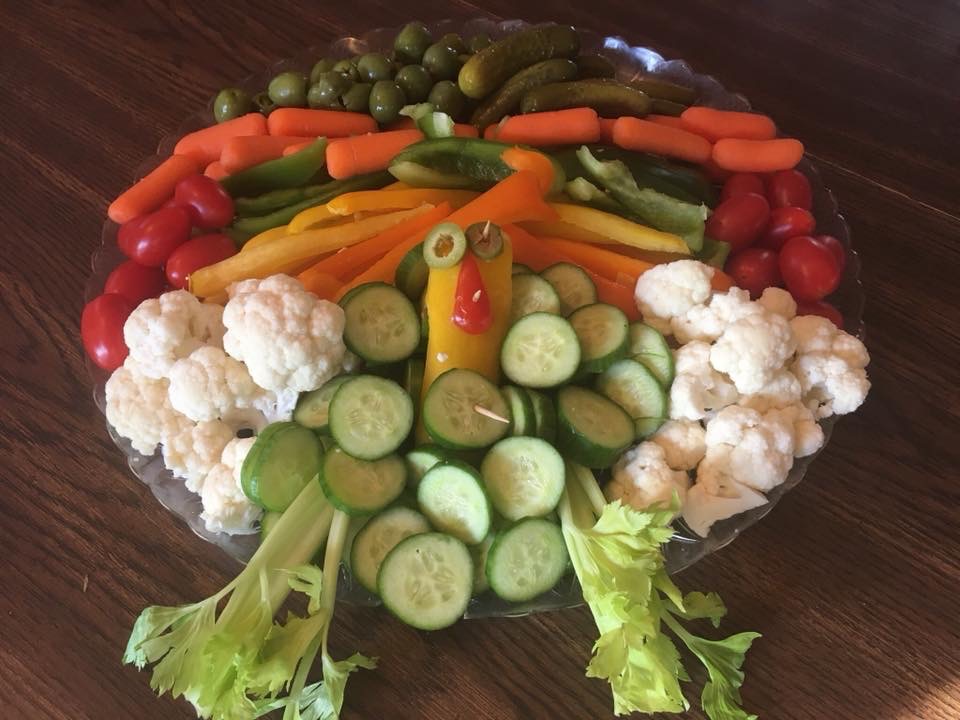
Thanksgiving Turkey Vegetable Tray

Thanksgiving Turkey Vegetable Tray

Print
clock clock iconcutlery cutlery iconflag flag iconfolder folder iconinstagram instagram iconpinterest pinterest iconfacebook facebook iconprint print iconsquares squares iconheart heart iconheart solid heart solid icon
Thanksgiving Turkey Vegetable Tray

Thanksgiving Turkey Vegetable Tray

5 Stars 4 Stars 3 Stars 2 Stars 1 Star No reviews
  • Author: Cherie | Taste & Review
  • Prep Time: 1 hour
  • Total Time: 1 hour

Ingredients

Scale

1 yellow bell pepper

1 orange bell pepper

1 green bell pepper

Half a head of cauliflower

2 cucumbers

2 celery sticks, leave the leaves on

1 cup grape tomatoes

1 cup green olives

1 cup of mini dill pickles

4 toothpicks

Round Tray


Instructions

Make The Turkey Face:

Cut a piece of yellow bell pepper about 1 inch wide. Then slice a green olive very finely to make 2 slices for the eyes. Take a toothpick to secure the eyes in place on the yellow bell pepper. To make the snood ( the red fleshy excrescences that flops over his beek) cut a piece of tomato and use a tooth pick to secure it.


Make The Turkey’s Body:

To make the body, gather and prep your veggies. We like to wash and cut to sizes that are easy for grabbing.


Creating The Turkey:

After all the vegetables are cut and the body is done you can assemble the vegetable turkey. Place the cucumbers in front and place the turkey body in between the cucumber on a round tray. Use a toothpick to secure the cucumber and turkey face. The celery should have the leaves on, as the leaves are the feet!  Place the 2 celery sticks it under the cucumbers and let it dangle off the tray. Then place the cauliflower florets on each side to make the wings. Behind the neck lay the bell peppers, tomatoes, carrots, pickles, and olives for feather.

Serve with dip of your choice!


Notes

 You can make this turkey vegetable platter up to 24 hours in advance. Just cover it tightly with plastic wrap and store it in the fridge.

Serve with dip of your choice!


Nutrition

  • Serving Size: 12
  • Calories: 24
  • Sugar: 2.9g
  • Sodium: 43mg
  • Fat: 0.2g
  • Saturated Fat: 0g
  • Carbohydrates: 5.4g
  • Fiber: 1.4g
  • Protein: 1.1g
  • Cholesterol: 0
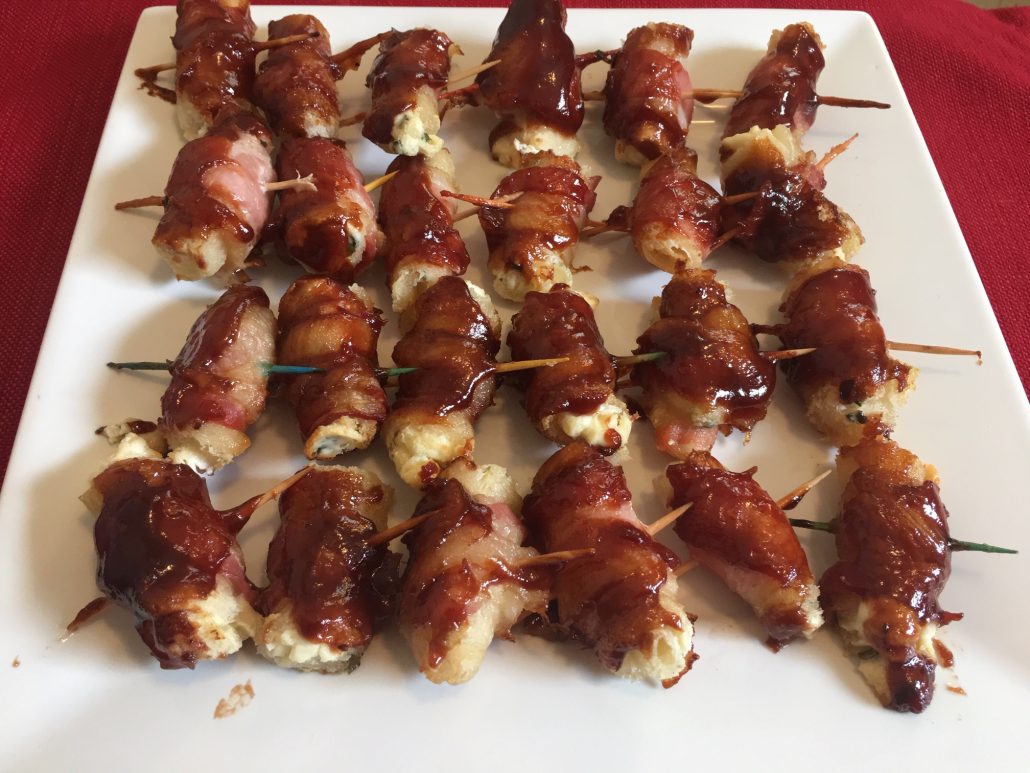
Bbq Bacon Cream Cheese Bites

Bbq Bacon Cream Cheese Bites

Print
clock clock iconcutlery cutlery iconflag flag iconfolder folder iconinstagram instagram iconpinterest pinterest iconfacebook facebook iconprint print iconsquares squares iconheart heart iconheart solid heart solid icon
Bbq Bacon Cream Cheese Bites

Bbq Bacon Cream Cheese Bites

5 Stars 4 Stars 3 Stars 2 Stars 1 Star No reviews
  • Author: Bryon | Taste & Review
  • Prep Time: 20 min
  • Cook Time: 25 min
  • Total Time: 45 min

Ingredients

Scale

1 loaf classic white bread loaf, crusts cut off
2 x 16 ounce of sliced bacon
8 ounce chive and onion cream cheese spread
1/2 cup barbecue sauce, brush barbecue sauce on top as needed
32 Toothpicks


Instructions

Preheat oven to 400ºF degrees.  Line a baking sheet with parchment paper.

On a cutting board cut all the bacon in half and set aside on a plate.

Cut off all the crusts off the bread. Then cut each slice of bread horizontally and set on a plate.

Take a butter knife and spread a dollop of chive and onion cream cheese spread on each slice of bread.

Roll up the cream cheese bread tightly and wind a piece of bacon around it. The bacon should cover the whole piece of bread. Secure with a toothpick then place on parchment paper.  Repeat this pattern till all the bites are made.

Place the uncooked bites into the oven and bake for 20 minutes.

Take the bites out of the oven and use a basting brush to spread barbecue sauce on each bite.

Place back into the over for another 5 minutes.

Remove from oven and serve warm.


Nutrition

  • Serving Size: 32
  • Calories: 92
  • Sugar: 1.4g
  • Sodium: 329mg
  • Fat: 7.2g
  • Saturated Fat: 3.2g
  • Carbohydrates: 2.6g
  • Fiber: 0.1g
  • Protein: 3.9g
  • Cholesterol: 19mg
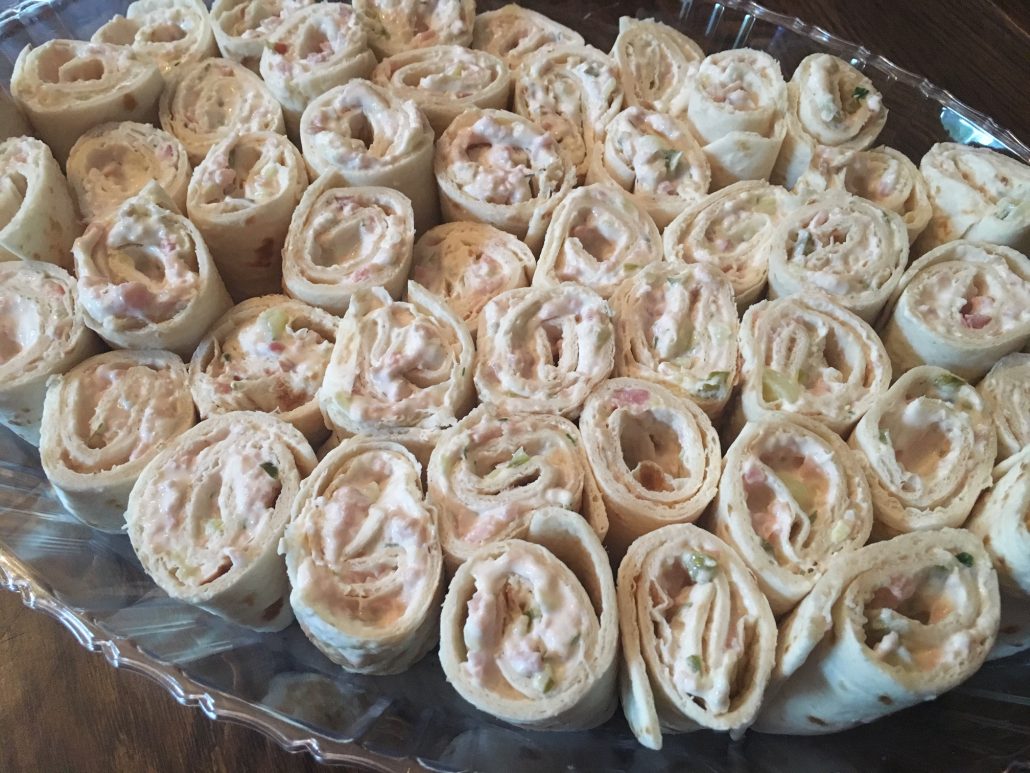
Low Carb Ham Pickle Pinwheels

Low Carb Ham Pickle Pinwheels

Print
clock clock iconcutlery cutlery iconflag flag iconfolder folder iconinstagram instagram iconpinterest pinterest iconfacebook facebook iconprint print iconsquares squares iconheart heart iconheart solid heart solid icon
Low Carb Ham Pickle Pinwheels

Low Carb Ham Pickle Pinwheels

5 Stars 4 Stars 3 Stars 2 Stars 1 Star 5 from 1 review
  • Author: Cherie | Taste & Review
  • Prep Time: 70 minutes
  • Total Time: 1 hour 10 minutes

Ingredients

Scale

6 pickle spears
12 ham slices
1 teaspoon fresh chives
1 teaspoon fresh dill
1 teaspoon garlic powder
2 x 8 ounces cream cheese, room temperature
3 x 12 ounce Mission Carb Balance flour tortillas


Instructions

On a cutting board dice the pickles.

Place the ham slices in a food processor and blend till you have small chunks.

Place the diced ham, diced picks, fresh chives, fresh dill, garlic powder in a medium size bowl.

Place the cream cheese in a food processor and blend till it is nice and creamy.

Add the whipped cream cheese to the medium size bowl and stir with a spatula till everything is well combined. It should look like a dip at this point.

Spread the ham pickle dip mixture on a tortilla. Leave about 1/2″ on all sides. Roll the tortilla tightly and place on a large plate. Repeat this process till all the tortillas are used up. Use Saran Wrap and refrigerate the rolled tortillas for at least 2 hours to firm up.

Remove from the refrigerator and  place on a cutting board. Using a sharp knife cut the ends off. Then cut into 1″ pinwheels. 

Arrange on a plate and serve!


Nutrition

  • Serving Size: 72 pinwheels
  • Calories: 62
  • Sugar: .2g
  • Sodium: 206mg
  • Fat: 3.5g
  • Saturated Fat: 1.7g
  • Carbohydrates: 5.1g
  • Fiber: 2.8g
  • Protein: 2.7g
  • Cholesterol: 11mg
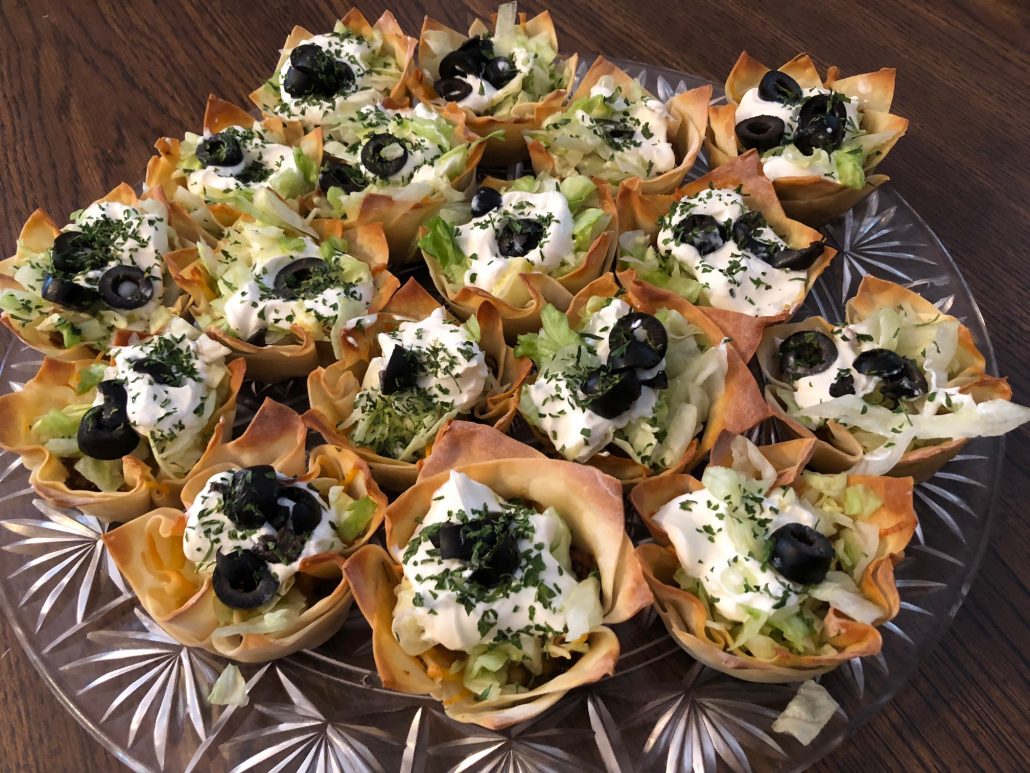
Taco Wonton Cups

Taco Wonton Cups

Print
clock clock iconcutlery cutlery iconflag flag iconfolder folder iconinstagram instagram iconpinterest pinterest iconfacebook facebook iconprint print iconsquares squares iconheart heart iconheart solid heart solid icon
Taco Wonton Cups

Taco Wonton Cups

5 Stars 4 Stars 3 Stars 2 Stars 1 Star No reviews
  • Author: Cherie DeBrule
  • Prep Time: 5 min
  • Cook Time: 15 min
  • Total Time: 20 min

Ingredients

Scale

1 pound lean ground beef, browned and drained

1 envelope ( 3 tablespoons) taco seasoning mix

8 ounce package taco blend shredded cheese

4 oz diced green chilies, 1 can

2.25 ounce sliced olives, 1 can

2 cups sour cream

2 cups shredded lettuce

48 wonton wrappers

2 tablespoons olive oil


Instructions

Preheat your oven to 375 °F.  Take a paper towel dipped in olive oil and grease all the muffin tin holes. Set aside.

Prepare The Taco Meat: Saute the brown beef in a large frying pan over medium heat (7-10 mins). Stir in the taco seasoning mix and diced green chilies till well combined.

Assemble The Taco Wonton Cups: Place one wonton wrapper over the bottom of each muffin tin. Then place another wonton wrapper on top of the other. It should fill out each muffin hole like a flower.  Fill the wontons with 1 teaspoon of taco meat. Next sprinkle on the shredded cheese.

Bake in the oven for 12-15 minutes or until golden brown.

Remove the wonton cups from the tray and top it with shredded lettuce, sour cream, and olives. Garnish with parsley if desired. Serve and enjoy!


Notes

Tip: Top with your favorite toppings (diced tomatoes, jalapeno, salsa, guacamole, chives, green onion,  avocado, fresh cilantro, corn, black beans, etc.).


Nutrition

  • Serving Size: 24
  • Calories: 302
  • Sugar: 2g
  • Sodium: 467mg
  • Fat: 8.6g
  • Saturated Fat: 3.9g
  • Carbohydrates: 42g
  • Fiber: 2.6g
  • Protein: 13.7
  • Cholesterol: 33mg
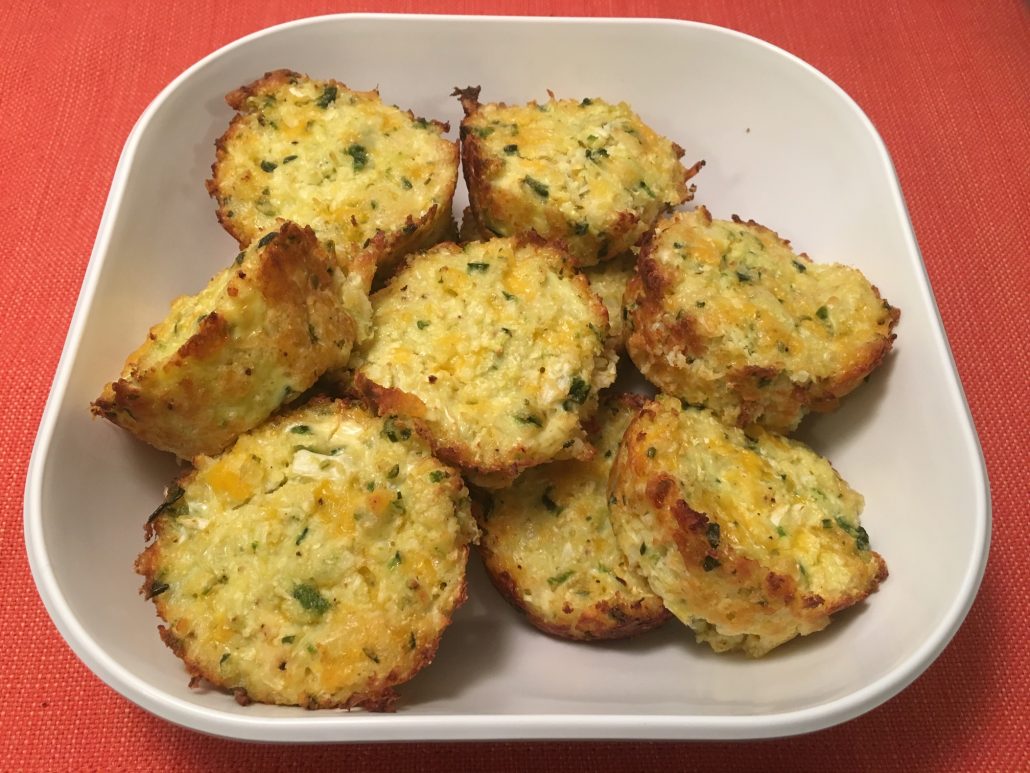
Keto Poblano Cheddar Muffins

Keto Poblano Cheddar Muffins

Print
clock clock iconcutlery cutlery iconflag flag iconfolder folder iconinstagram instagram iconpinterest pinterest iconfacebook facebook iconprint print iconsquares squares iconheart heart iconheart solid heart solid icon
Keto Poblano Cheddar Muffins

Keto Poblano Cheddar Muffins

5 Stars 4 Stars 3 Stars 2 Stars 1 Star No reviews
  • Author: Cherie | Taste & Review
  • Prep Time: 15 min
  • Cook Time: 30min
  • Total Time: 45min

Ingredients

Scale

2 cups riced, raw cauliflower

1 poblano pepper minced

2 large eggs, beaten

2 tablespoons melted butter

2 tablespoons butter or ghee, grease muffin pan

1/3 cup grated parmesan cheese

1 cup grated mozzarella cheese

1 cup grated cheddar cheese

1 tablespoon dried onion flakes

1/4 teaspoon salt

1/4 teaspoon black pepper

1/2 teaspoon garlic powder

1/2 teaspoon baking powder

2 teaspoon dried chives

1/4 cup coconut flour


Instructions

Preheat oven to 350°F. 

Grease a muffin pan with butter or ghee and set aside.

In a large bowl beat 2 eggs. Add 2 tablespoons of melted butter.

Rice the cauliflower with a box grater or food processor. If using the box grater use the medium-sized holes to grate the cauliflower into a rice like texture. Then add the rice cauliflower to the big bowl.

On a cutting board mince the poblano pepper and then add to the big bowl.

Then add the grated parmesan cheese, mozzarella cheese, cheddar cheese, dried onion flakes, salt, black pepper, garlic powder, baking powder, dried chives, and coconut flour. 

Stir till everything is well combined.

Use a spatula and divide the batter into the 12 greased muffin cups.

Bake the poblano cheddar muffins for 30 minutes or until they are golden brown.

Let the muffins cool for one hour before taking out of pan or serving.


Notes

Wear plastic gloves if you have sensitive skin when cutting the poblano pepper. Leftovers can be in the refrigerator for up to one week or three months in the freezer. Don’t use muffin/cupcake liners as they will stick to the paper.


Nutrition

  • Serving Size: 12
  • Calories: 135
  • Sugar: .7g
  • Sodium: 221mg
  • Fat: 9.7g
  • Saturated Fat: 5.9g
  • Carbohydrates: 5.4g
  • Fiber: 2.7g
  • Protein: 6.6g
  • Cholesterol: 56mg
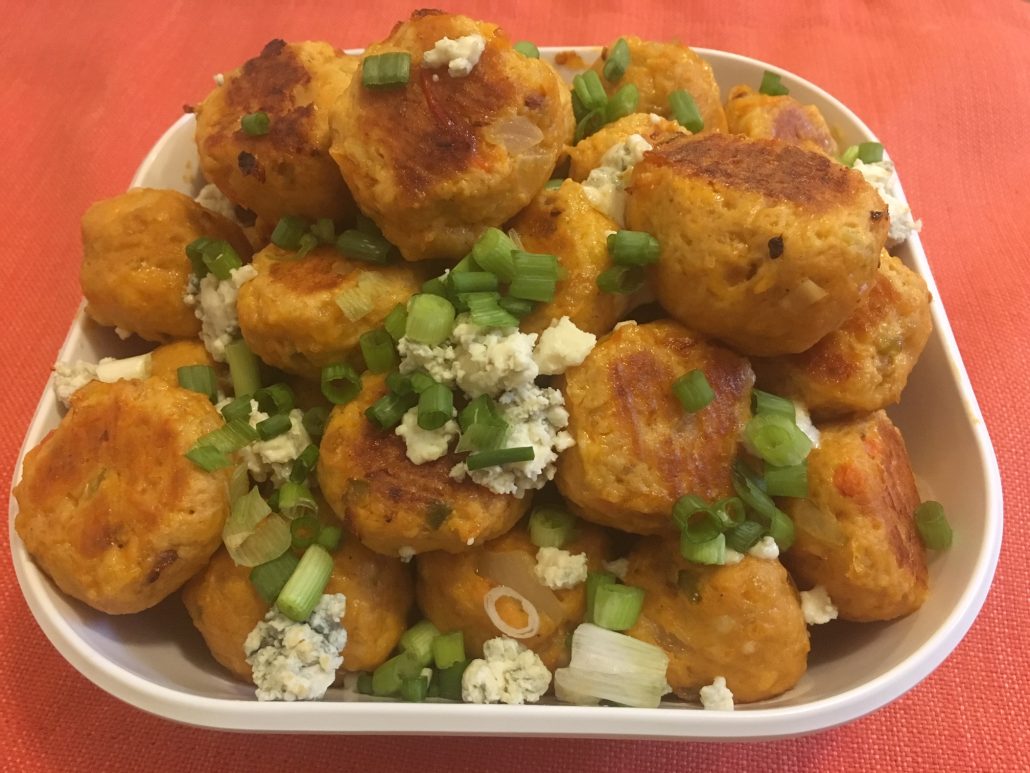
Low Carb Buffalo Chicken Meatballs

Low Carb Buffalo Chicken Meatballs

Print
clock clock iconcutlery cutlery iconflag flag iconfolder folder iconinstagram instagram iconpinterest pinterest iconfacebook facebook iconprint print iconsquares squares iconheart heart iconheart solid heart solid icon
Low Carb Buffalo Chicken Meatballs

Low Carb Buffalo Chicken Meatballs

5 Stars 4 Stars 3 Stars 2 Stars 1 Star No reviews
  • Author: Cherie | Taste & Review
  • Prep Time: 30
  • Cook Time: 15
  • Total Time: 45

Ingredients

Scale

Buffalo Chicken Meatballs

  • 1 pound ground chicken
  • 1/3 cup almond flour
  • 2 garlic cloves, minced
  • 1/2 onion, minced
  • 1 celery stalk, chopped
  • ½ red pepper, finely diced
  • 1 egg, beaten
  • 2 cups shredded cheddar cheese
  • 1 cup crushed pork rinds
  • ½ cup Frank’s redhot wings buffalo sauce
  • 2 tablespoons, unsalted butter melted

Garnish & Toppings

  • 5 oz crumbled blue cheese
  • 2 green onions, finely chopped

Instructions

  1. This recipe makes about 2 dozen meatballs.
  2. Preheat the oven to 400ºF. Line 2 baking sheets with parchment paper.
  3. In a large frying pan, heat two tablespoons of butter until melted and hot. Add the minced garlic, minced onions, chopped celery, and finely diced red pepper. Saute the vegetables until soft and onions are translucent.
  4. In a large mixing bowl add all the buffalo chicken meatballs ingredients including the sauteed vegetables. Then using your hands and fingers mix the buffalo chicken meatball mixture. Don’t over mix into a paste.
  5. Keep your hands oiled so the meatball mixture won’t stick to your hands. Then use a tablespoon size scoop or spoon to gently form the meatballs. Use your hands and fingers to roll the meat mixture into balls. Place the meatballs onto the parchment paper lined sheet. Keep going till all the meatball mixture is used.
  6. Bake the meatballs for 15 minutes or until the center has reached 160ºF. Serve the buffalo chicken meatballs on a plate and garnish with crumbled blue cheese and green onions.

Notes

  • Serve with celery sticks and bleu cheese dressing. If desired add more hot sauce on top of meatballs.

Nutrition

  • Serving Size: 24
  • Calories: 119
  • Sugar: 0
  • Sodium: 164
  • Fat: 9
  • Saturated Fat: 4
  • Unsaturated Fat: 4
  • Trans Fat: 0
  • Carbohydrates: 2
  • Protein: 9
  • Cholesterol: 46
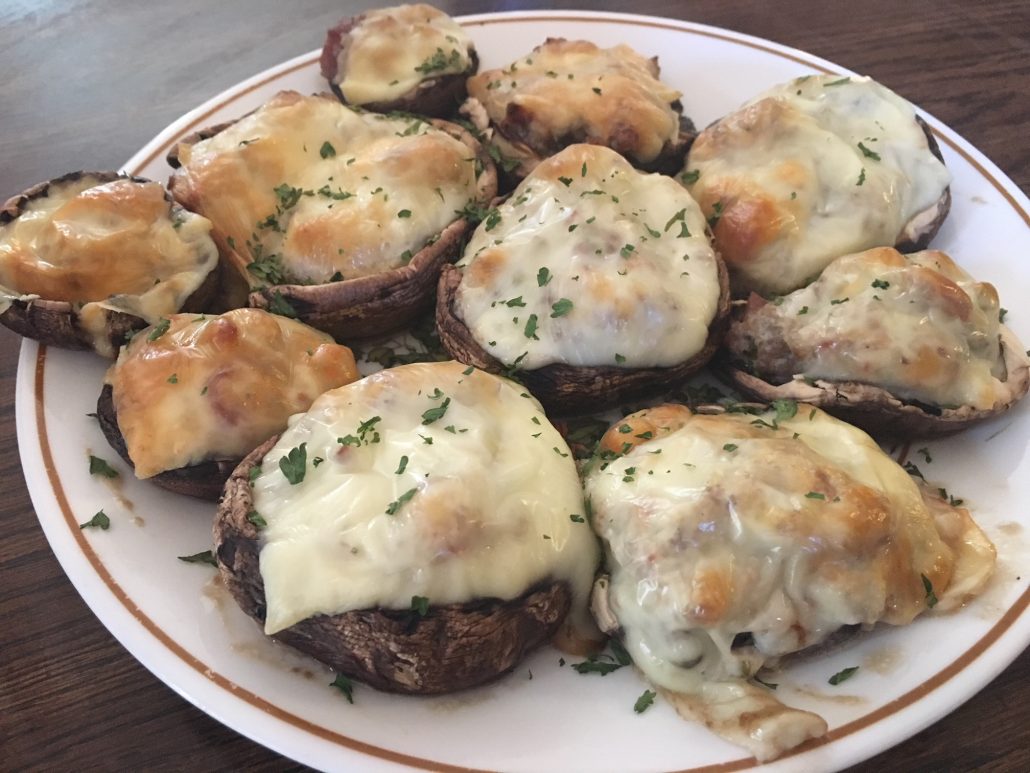
Keto Sausage Stuffed Mushrooms

Keto Sausage Stuffed Mushrooms

Print
clock clock iconcutlery cutlery iconflag flag iconfolder folder iconinstagram instagram iconpinterest pinterest iconfacebook facebook iconprint print iconsquares squares iconheart heart iconheart solid heart solid icon
Keto Sausage Stuffed Mushrooms

Keto Sausage Stuffed Mushrooms

5 Stars 4 Stars 3 Stars 2 Stars 1 Star No reviews
  • Author: Bryon | Taste & Review
  • Prep Time: 20
  • Cook Time: 20
  • Total Time: 40

Ingredients

Scale
  • 3 x 8 Oz package (24 count) large fresh baby bella
  • (Crimini) mushrooms, stems removed
  • 1 package (2.5 Oz) Real bacon bits
  • 1 (8 Oz) package cream cheese chive & onion, softened
  • 1 (16 Oz) pork sausage
  • 1 package (8 Oz) mozzarella cheese
  • 1 teaspoon parsley

Instructions

  1. Preheat the oven to 350ºF. Line baking sheet with parchment paper.
  2. Clean all the mushrooms with a damp paper towel.
  3. Remove stems and hollow out each mushroom.
  4. Heat frying pan over medium heat. Fry the sausage and crumbled it till it is browned and cooked through, about 5 minutes. Drain and discard the grease.
  5. Turn the heat off the stove and add the package cream cheese chive & onion and real bacon bits. Stir till the cream cheese is melted and the mixture is well combined.
  6. Use a small spoon and carefully stuff each mushroom with cream cheese chive & onion sausage mixture. Place all the stuffed mushrooms on the lined baking sheet.
  7. Slice mozzarella cheese and place on top of each mushroom. Sprinkle parsley on top of each mushroom.
  8. Bake the stuffed mushrooms for 20-25 minutes or until golden brown.


Nutrition

  • Serving Size: 24
  • Calories: 130
  • Sugar: 0
  • Sodium: 239
  • Fat: 8
  • Saturated Fat: 3
  • Unsaturated Fat: 4
  • Trans Fat: 0
  • Carbohydrates: 7
  • Protein: 8
  • Cholesterol: 21
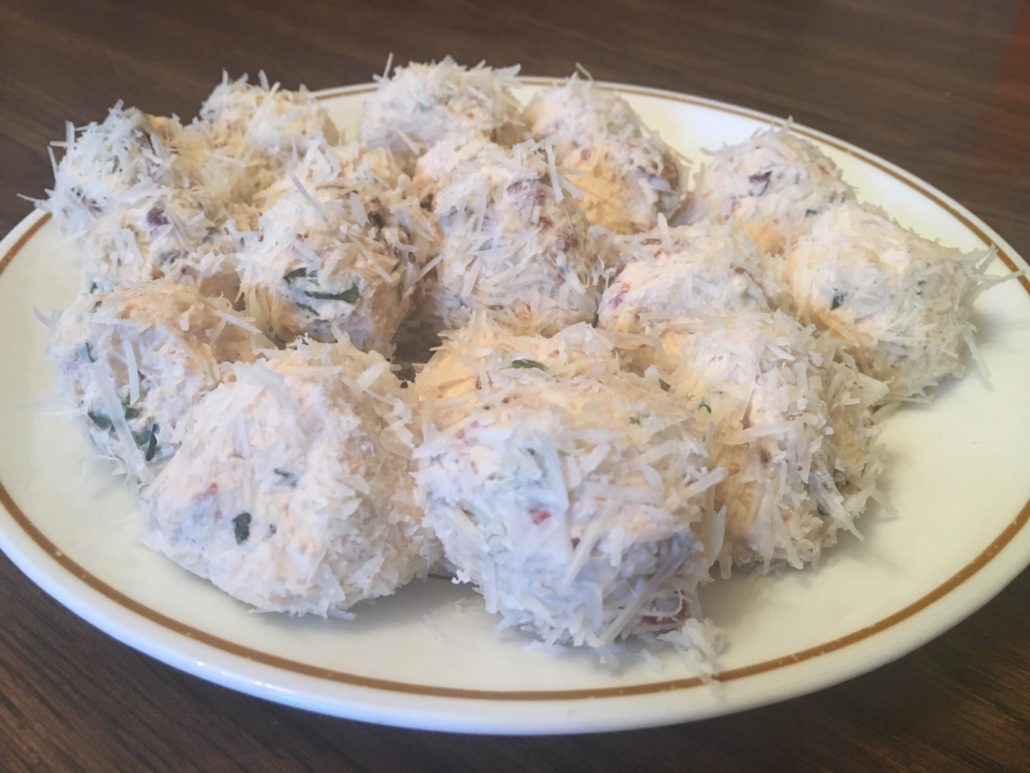
Olive Tomato Basil Fat Bombs

Olive Tomato Basil Fat Bombs

Print
clock clock iconcutlery cutlery iconflag flag iconfolder folder iconinstagram instagram iconpinterest pinterest iconfacebook facebook iconprint print iconsquares squares iconheart heart iconheart solid heart solid icon
Olive Tomato Basil Fat Bombs

Olive Tomato Basil Fat Bombs

5 Stars 4 Stars 3 Stars 2 Stars 1 Star No reviews
  • Author: Cherie | Taste & Review
  • Prep Time: 15
  • Total Time: 30

Ingredients

Scale
  • 1 (8 0z) cream cheese package, softened at room tempature
  • ¼ cup ghee
  • 3 tablespoon fresh basil, finely chopped
  • 1 garlic clove, finely chopped
  • 1/3 cup sun dried tomatoes, drained and finely chopped
  • 8 kalamata olives, pitted, chopped
  • 1 ½ cup finely shredded parmesan cheese
  • ¼ teaspoon freshly ground pepper

Instructions

  1. Line a small baking sheet with parchment paper and set aside.
  2. On a cutting board chop up the fresh basil, garlic clove, sun dried tomatoes, and kalamata olives.
  3. Then place ½ cup parmesan cheese into a stand mixer, reserving the rest for later for coating the balls. Add in the softened cream cheese, ghee, basil, garlic, sun dried tomatoes, kalamata olives, and freshy ground pepper. Whisk through to combine all the ingredients using the paddle attachment. Then place the bowl in the freezer for 10 minutes to firm the fat bombs batter.
  4. Take out the fat bombs batter from the freezer. Use a small teaspoon and your hands and roll out 20 balls. Place all the rolled balls onto the lined baking sheet.
  5. In a separate small bowl add 1 cup of parmesan cheese. Then roll each ball in the parmesan cheese. Making sure that each ball is coated in cheese. Place the coated balls back on the baking sheet. Repeat till all the fat bomb balls are coated with cheese. Then place the baking sheet with the decorative fat bombs back into the freezer for another 10 minutes.
  6. Take out the fat bombs and transfer them to an airtight container placing it back in the freezer till you are ready to serve.


Nutrition

  • Serving Size: 20
  • Calories: 91
  • Sugar: 1
  • Sodium: 153
  • Fat: 8
  • Saturated Fat: 5
  • Unsaturated Fat: 3
  • Trans Fat: 0
  • Carbohydrates: 1
  • Protein: 3
  • Cholesterol: 23
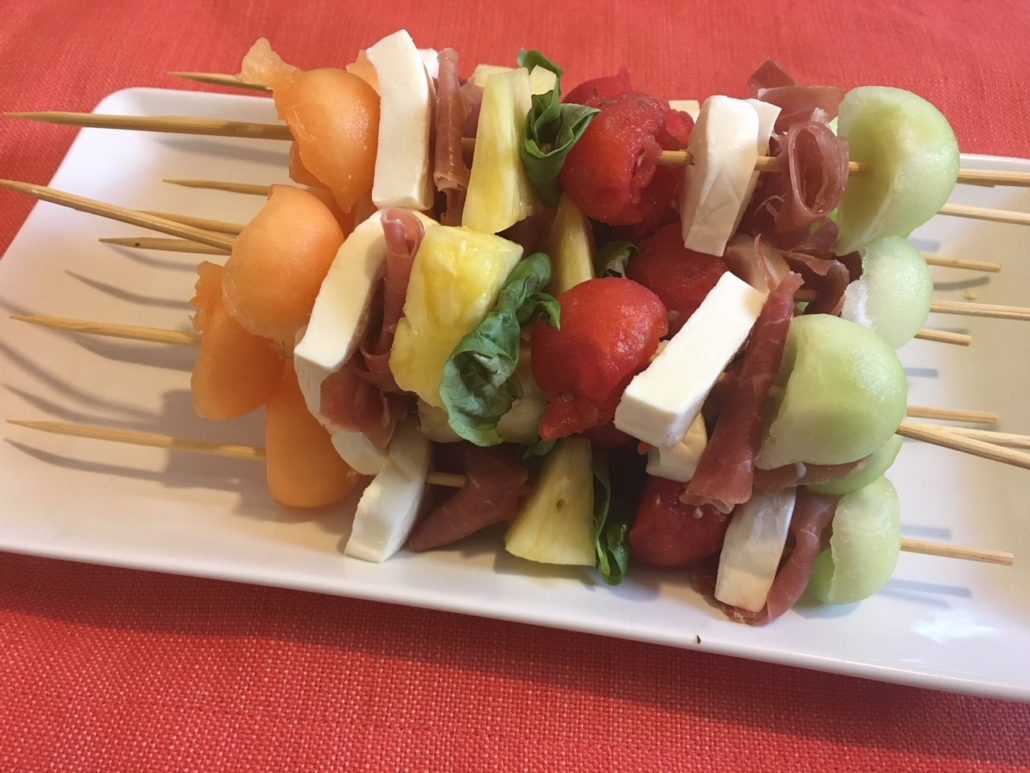
Melon, Mozzarella, & Prosciutto Skewers

Melon, Mozzarella, & Prosciutto Skewers

Print
clock clock iconcutlery cutlery iconflag flag iconfolder folder iconinstagram instagram iconpinterest pinterest iconfacebook facebook iconprint print iconsquares squares iconheart heart iconheart solid heart solid icon
Melon Mozzarella Prosciutto Skewers

Melon, Mozzarella, & Prosciutto Skewers

5 Stars 4 Stars 3 Stars 2 Stars 1 Star No reviews
  • Author: Cherie | Taste & Review
  • Prep Time: 60
  • Total Time: 1 hour

Ingredients

Scale
  • Cantaloupe, 20 melon balls or cut into 20 cubes
  • Honeydew, 20 melon balls or cut into 20 cubes
  • Watermelon, 20 melon balls or cut into 20 cubes
  • Pineapple, 20 chunks
  • 2 ( 8 Oz.) mozzarella balls (ciliegine), cut into 40 pieces
  • 2 (3 Oz.) 40 slices of Prosciutto
  • 20 fresh Basil leaves
  • 20 (12 inch) wooden skewers
  • Balsamic vinegar, for drizzling

Instructions

  1. Take a melon baller tool and scoop out 20 balls of the cantaloupe, honeydew, watermelon and set
  2. aside. If you don’t have a melon baller tool you can cut them into cubes.
  3. Next cut the pineapple into 20 small chunks and set aside.

Assemble the Melon, Mozzarella, & Prosciutto Skewers

  1. Thread 1 cantaloupe ball, 1 mozzarella piece, 1 prosciutto piece, 1 pineapple chunk,1 basil leaf, 1 watermelon ball, 1 mozzarella ball, 1 prosciutto piece, 1 honeydew ball onto each wooden skewer.
  2. Repeat this pattern till all the wooden skewers are assembled. Place on a serving platter.
  3. Serve with balsamic vinegar. Let your guest decide how much they want to drizzle on.


Nutrition

  • Serving Size: 20
  • Calories: 135
  • Sugar: 7
  • Sodium: 338
  • Fat: 8
  • Saturated Fat: 4
  • Unsaturated Fat: 3
  • Trans Fat: 0
  • Carbohydrates: 9
  • Protein: 7
  • Cholesterol: 25
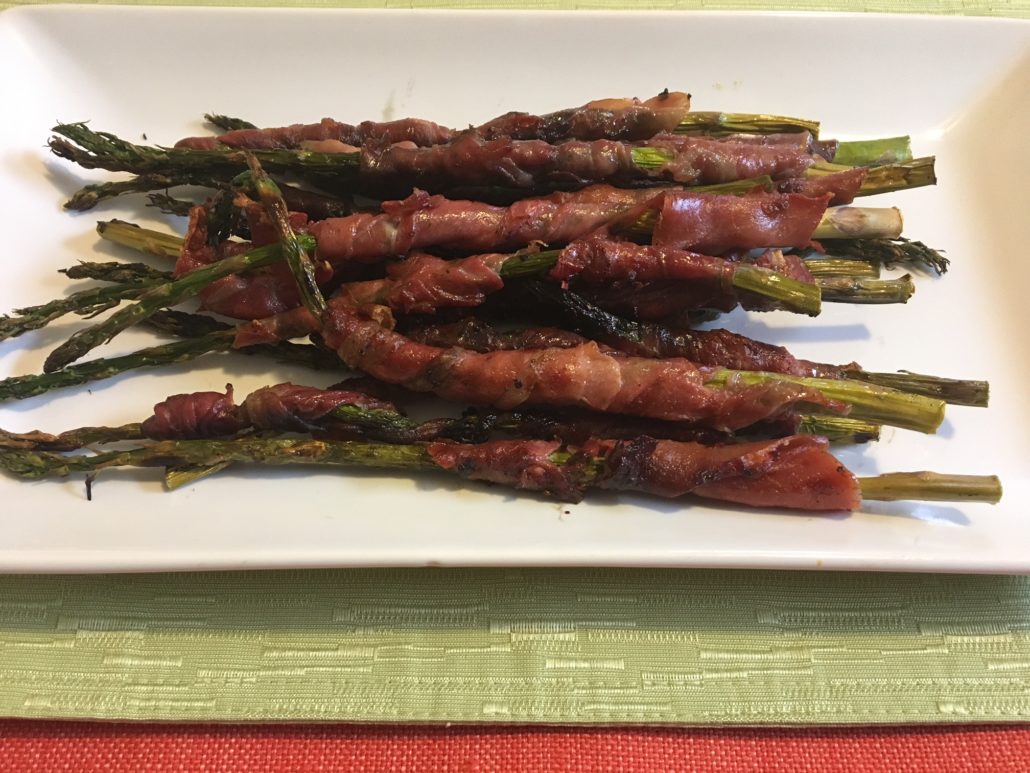
Grilled Prosciutto Wrapped Asparagus

Grilled Prosciutto Wrapped Asparagus

Print
clock clock iconcutlery cutlery iconflag flag iconfolder folder iconinstagram instagram iconpinterest pinterest iconfacebook facebook iconprint print iconsquares squares iconheart heart iconheart solid heart solid icon

Grilled Prosciutto Wrapped Asparagus

5 Stars 4 Stars 3 Stars 2 Stars 1 Star No reviews
  • Author: Bryon | Taste & Review
  • Prep Time: 10
  • Cook Time: 12
  • Total Time: 22

Ingredients

Scale
  • 1 pound asparagus spears, trimmed
  • 1 (3 oz) package of prosciutto slices
  • ¼ cup extra virgin olive oil
  • 2 tablespoons lemon juice
  • 1 teaspoons onion powder
  • 2 teaspoons freshly ground black pepper

Instructions

  1. Preheat grill to medium heat.While the grill is heating up you can prepare the food.
  2. In a small bowl combine extra virgin olive oil, lemon juice, onion powder, and ground black pepper. Set aside.
  3. On a cutting board cut off the bottom 2 inches of each asparagus spear. The stalky woody bottom should be cut off.
  4. Take one slice of prosciutto and twirl it around to wrap each asparagus spear. The prosciutto will stick to the asparagus as you twist it on it. Continue this pattern till all the asparagus are wrapped.
  5. Place the prosciutto wrapped asparagus spears into the olive oil mixture. Take tongs and mix all the spears so they are all drenched in the olive oil mixture.
  6. Take the tongs and place the asparagus spears on the grill. Cook on low for 6 minutes a side or until prosciutto is crisp and asparagus is tender.

Notes

  • Do not add any additional salt to this recipe as the prosciutto is salty enough.

Nutrition

  • Serving Size: 6
  • Calories: 157
  • Sugar: 2
  • Sodium: 324
  • Fat: 14
  • Saturated Fat: 3
  • Unsaturated Fat: 10
  • Trans Fat: 0
  • Carbohydrates: 4
  • Protein: 5
  • Cholesterol: 11