Posts

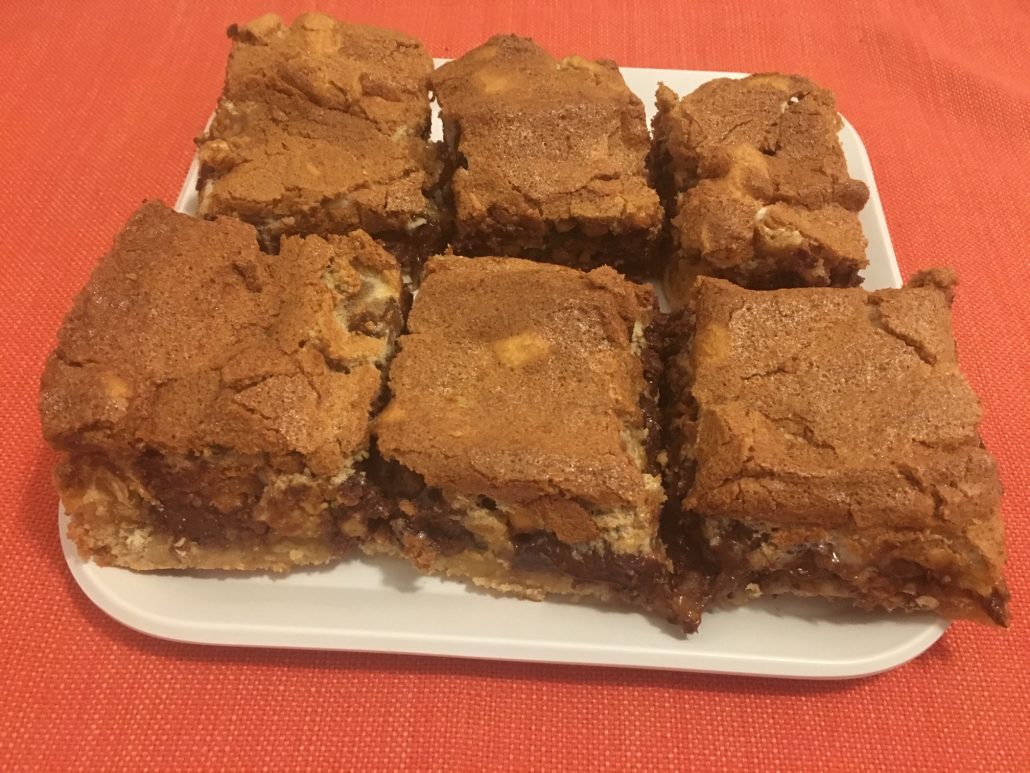
Mud Hen Crunch Bars

Mud Hen Crunch Bars

Print
clock clock iconcutlery cutlery iconflag flag iconfolder folder iconinstagram instagram iconpinterest pinterest iconfacebook facebook iconprint print iconsquares squares iconheart heart iconheart solid heart solid icon
Mud Hen Crunch Bars

Mud Hen Crunch Bars

5 Stars 4 Stars 3 Stars 2 Stars 1 Star No reviews
  • Author: Cherie | Taste & Review
  • Prep Time: 10 min
  • Cook Time: 40 min
  • Total Time: 50 min

Ingredients

Scale

1 tablespoon Crisco All-Vegetable Shortening

1 cup butter

1 cup sugar

5 eggs

1 1/2 cups flour

1 teaspoon baking powder

1/4 teaspoon salt

1 cup ripple potato chips, crushed

1 cup pretzel sticks, crushed

1 1/2 cup mini marshmallows

3/4 cup semi-sweet chocolate chips

3/4 cup butterscotch baking chips

1 cup light brown sugar, packed


Instructions

Preheat the oven to 355ºF. Grease a 9 by 13 inch pan with Crisco.

For this recipe you will need 2 medium size bowl or use a mixing bowl. One for the bottom layer and the second bowl will be for the top layer.

In a medium size mixing bowl combine the butter and sugar. Beat it till it is creamed together.

Add 1 whole egg and 2 egg yolks. Beat the mixture till the eggs well combined.

Add flour, baking powder, and salt.   Beat the mixture for another 2 minutes. Then spread the mixture in the greased pan. The dough will be sticky. Use a butter knife to smooth and level it out in the pan.

Put the crushed ripple potato chips, crushed pretzel sticks on the next layer. Use a fork to spread it even and push into the dough.

Then sprinkle on the chocolate chips, butterscotch chips, and mini marshmallows. Keep chips and marshmallows away from the edge of pan.

For the last layer you will need another medium size bowl. Beat 4 egg whites until stuff. Add the brown sugar. Then using a spatula to spread the brown sugar meringue mixture on top.

Bake at 350ºF for 40 minutes. Allow to cool completely before cutting into squares. Store airtight at room temperature for up to 3 days.


Nutrition

  • Serving Size: 12-24
  • Calories: 342
  • Sugar: 24.3g
  • Sodium: 282mg
  • Fat: 17g
  • Saturated Fat: 9.3g
  • Carbohydrates: 43.2g
  • Fiber: 1g
  • Protein: 4.8g
  • Cholesterol: 56mg
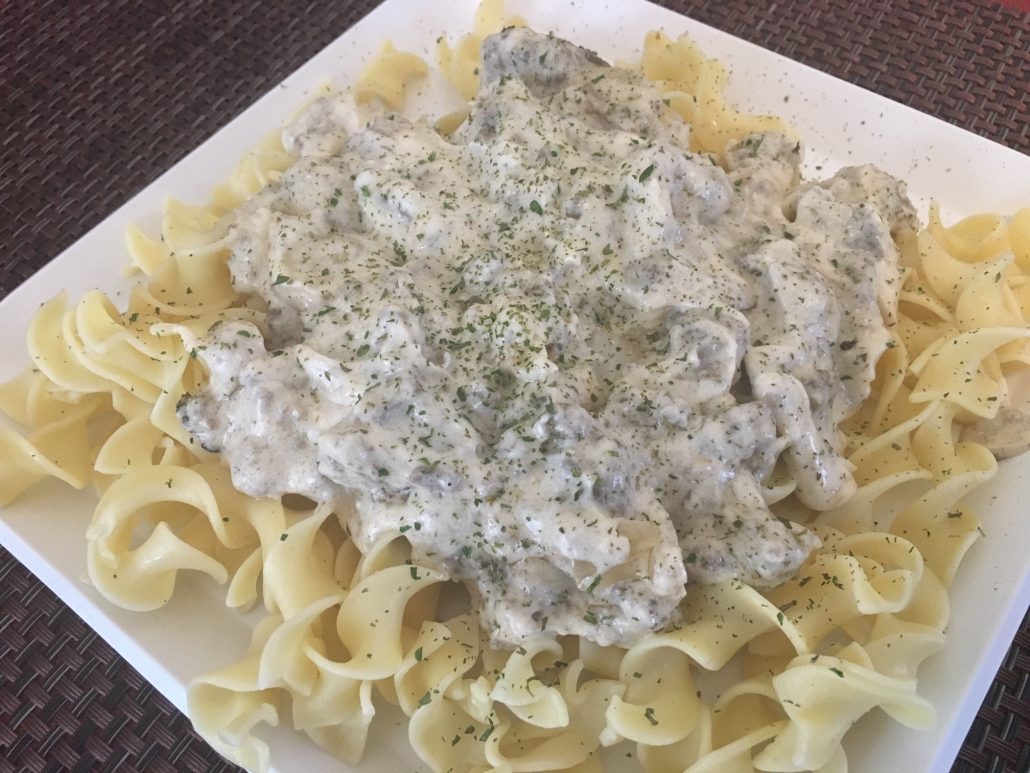
Hamburger Stroganoff

Hamburger Stroganoff

Print
clock clock iconcutlery cutlery iconflag flag iconfolder folder iconinstagram instagram iconpinterest pinterest iconfacebook facebook iconprint print iconsquares squares iconheart heart iconheart solid heart solid icon
Hamburger Stroganoff

Hamburger Stroganoff

5 Stars 4 Stars 3 Stars 2 Stars 1 Star No reviews
  • Author: Cherie | Taste & Review
  • Prep Time: 10
  • Cook Time: 20
  • Total Time: 30

Ingredients

Scale

1 onion, chopped
1 clove garlic
1 pound ground beef
2 tablespoon flour
1 teaspoon salt
1/4 teaspoon pepper
1 can cream of mushroom soup
1 cup Top the Tator sourcream
1/4 cup butter
Egg Noodles, 12 ounce package


Instructions

Make The Noodles:
Bring a large pot of water to boil. Cook the egg noodles according to the package directions, about 5 minutes. Rinse and drain.

Make The Sauce:
In a large frying pan saute the onion and garlic in butter till the onions are translucent, about 5 minutes.

Add in the ground beef. Stir and break the hamburger into smaller pieces until the meat is no longer pink, 5 to 7 minutues.

Sprink the flour over the hamburger mixture and stir till well combined.

Stir in the cream of mushroom soup, salt and pepper and simmer uncovered for 10 minutes.

Stir in the Top the Tator sourcream.

Serve the hamburger stragnoff mixture over cooked egg noodles. Garnish with parsley if desired.


Nutrition

  • Serving Size: 6
  • Calories: 366
  • Sugar: 1.8g
  • Sodium: 828mg
  • Fat: 19g
  • Saturated Fat: 9.4g
  • Carbohydrates: 21.8g
  • Fiber: 1.2g
  • Protein: 26.2g
  • Cholesterol: 107mg
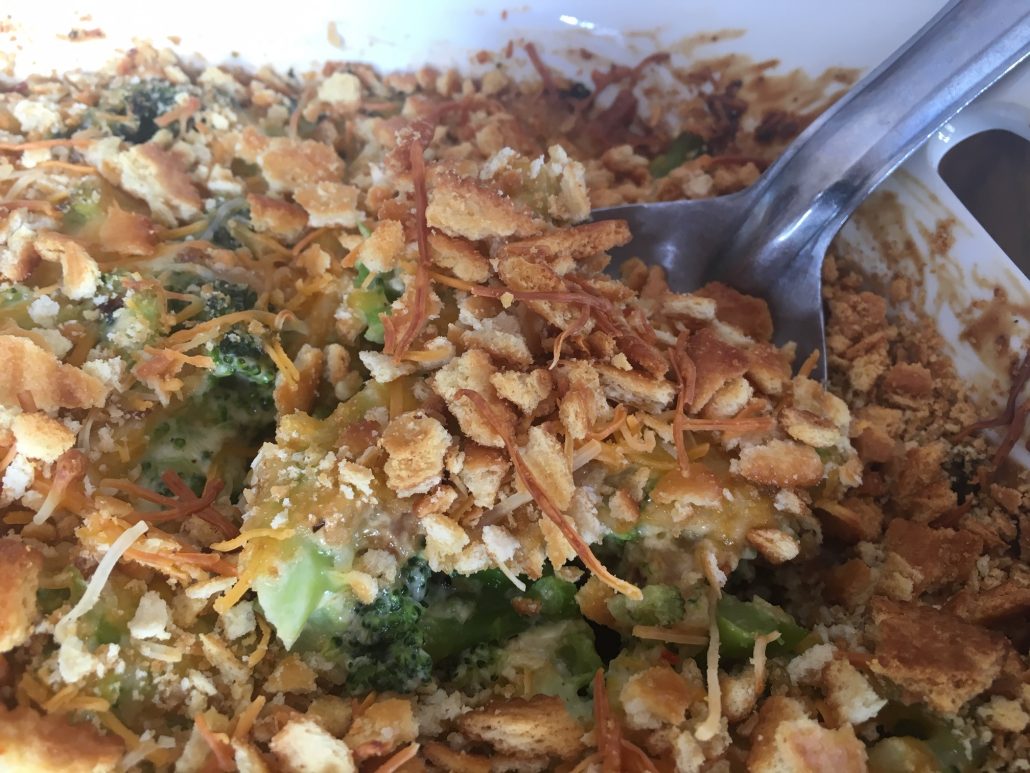
Broccoli Casserole

Broccoli Casserole

Print
clock clock iconcutlery cutlery iconflag flag iconfolder folder iconinstagram instagram iconpinterest pinterest iconfacebook facebook iconprint print iconsquares squares iconheart heart iconheart solid heart solid icon
Broccoli Casserole

Broccoli Casserole

5 Stars 4 Stars 3 Stars 2 Stars 1 Star No reviews
  • Author: Cherie | Taste & Review
  • Prep Time: 15 min
  • Cook Time: 35 min
  • Total Time: 50 min

Ingredients

Scale

2 x (12 ounces) broccoli florets, cut into small pieces

1/2 yellow onion, diced

4 tablespoons unsalted butter, melted

10.5 ounces condensed cream of mushroom soup

3/4 cup mayonnaise

2 large eggs

3 cups taco shredded cheese

1/2 teaspoon salt

1/4 teaspoon coarse ground black pepper

3.5 ounces crispy fried onions

1 cup round butter crackers, finely crushed


Instructions

Preheat oven to 350ºF.

Thaw out the frozen broccoli overnight. On a cutting board chop up the thawed broccoli florets into smaller pieces. There should be a variety of smaller chunks of and tiny ones.  Then dice half of a yellow onion. Set Aside.

In a large mixing bowl beat the 2 eggs. Then combine the melted butter, cream of mushroom soup, mayonnaise, salt, and pepper until well combined to make the sauce.  

Stir in the crispy fried onions and 2 cups of the taco shredded cheese, reserving 1 cup left to put on top later.

Pour the broccoli casserole batter into a 9 x 13 inch backing dish. Top with remaining 1 cup of the taco shredded cheese and finely crushed crackers.

Bake for 30 minutes uncovered or until top is golden.  Allow time to cool before serving.


Nutrition

  • Serving Size: 10
  • Calories: 301
  • Sugar: 3.3g
  • Sodium: 668mg
  • Fat: 21.7g
  • Saturated Fat: 6.9g
  • Carbohydrates: 21.9g
  • Fiber: 2.5g
  • Protein: 6.8g
  • Cholesterol: 61mg
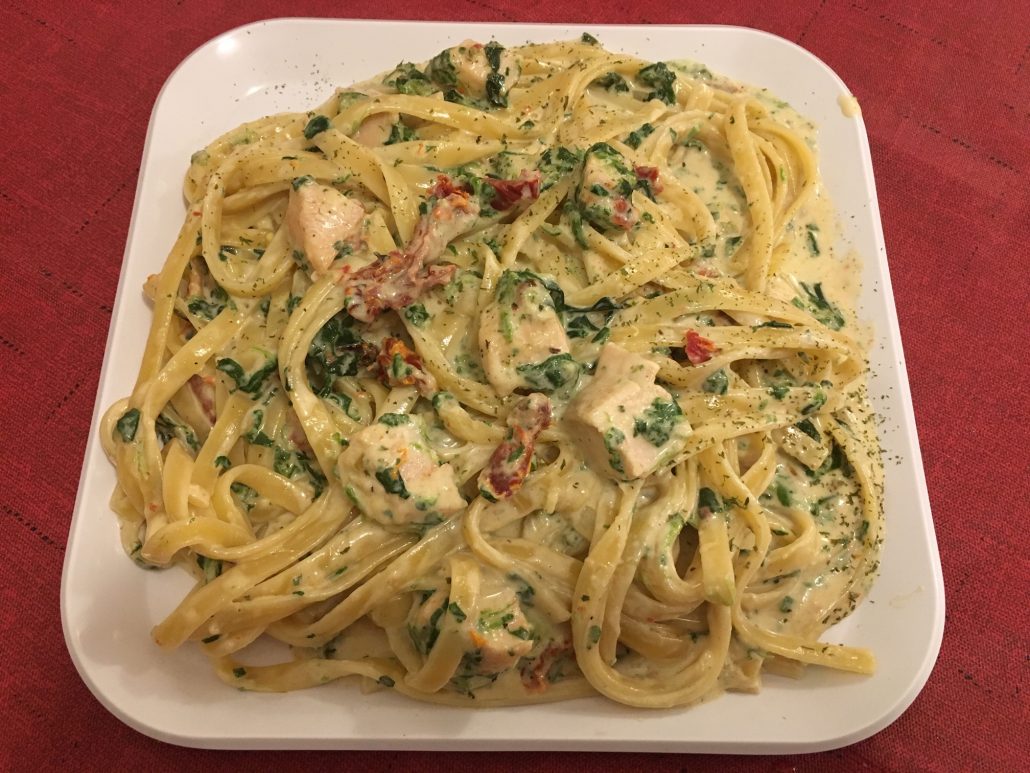
Spinach and Sun-Dried Tomato Chicken Pasta Alfredo

Spinach and Sun-Dried Tomato Chicken Alfredo

Print
clock clock iconcutlery cutlery iconflag flag iconfolder folder iconinstagram instagram iconpinterest pinterest iconfacebook facebook iconprint print iconsquares squares iconheart heart iconheart solid heart solid icon
Spinach and Sun-Dried Tomato Chicken Pasta Alfredo

Spinach and Sun-Dried Tomato Chicken Alfredo

5 Stars 4 Stars 3 Stars 2 Stars 1 Star No reviews
  • Author: Cherie | Taste & Review
  • Prep Time: 20
  • Cook Time: 40
  • Total Time: 60 min

Ingredients

Scale

¼ cup butter

3 cups heavy whipping cream

4 cloves garlic, crushed

2 x (5 ounces) freshly shredded parmesan cheese

10 ounces of chopped frozen spinach ( 1 box), drained and thawed

8.5 ounces of sun-dried tomatoes julienne cut (1 jar)

2 boneless, skinless chicken breasts grilled

¼ cup chopped parsley

1 tablespoon lemon juice

1 egg yolk

¼ teaspoon salt

¼ teaspoon pepper

12 ounces Barilla fettuccine pasta


Instructions

Grilled Chicken:

For this recipe the chicken breasts are grilled 5-7 minutes per side, or until juices run clear. Make sure to pound the breasts before grilling. The internal temperature should reach 165°F, then you can remove it from the grill. After the chicken breasts have cooled enough to touch you can chop it into pieces using a knife on a cutting board.  

Make The Alfredo Sauce:

On a cutting board chop the garlic cloves finely.

In a medium sauce pan melt the butter over medium heat. Add the heavy whipping cream into the pan and simmer for 5 minutes. Then add the garlic, salt, pepper, and freshly shredded parmesan cheese. Whisk it quickly until it is all melted and well combined. Add the egg yolk and lemon juice and stir. Sauce will be thickened. If the mixture is too thick you can add more cream.

Turn the heat on low and add the spinach. Drain the oil out of the sun-dried tomatoes and blot it with a paper towel. Then add the sun-dried tomatoes to the sauce and stir.

Cook The Fettuccine Noodles:

Cook the pasta noodles according to the package instructions and drain.

Combine All The Ingredients:

After the chicken is done grilling and pasta is cooked you can stir them both in and gently toss to combine.

Serve right away and garnish with parsley and more fresh parmesan if desired.


Notes

This recipe is great for that special date or holiday meal. 


Nutrition

  • Serving Size: 6
  • Calories: 785
  • Sugar: 5.4g
  • Sodium: 2273mg
  • Fat: 50.3g
  • Saturated Fat: 28.3g
  • Carbohydrates: 44.6g
  • Fiber: 4g
  • Protein: 39.9g
  • Cholesterol: 239mg
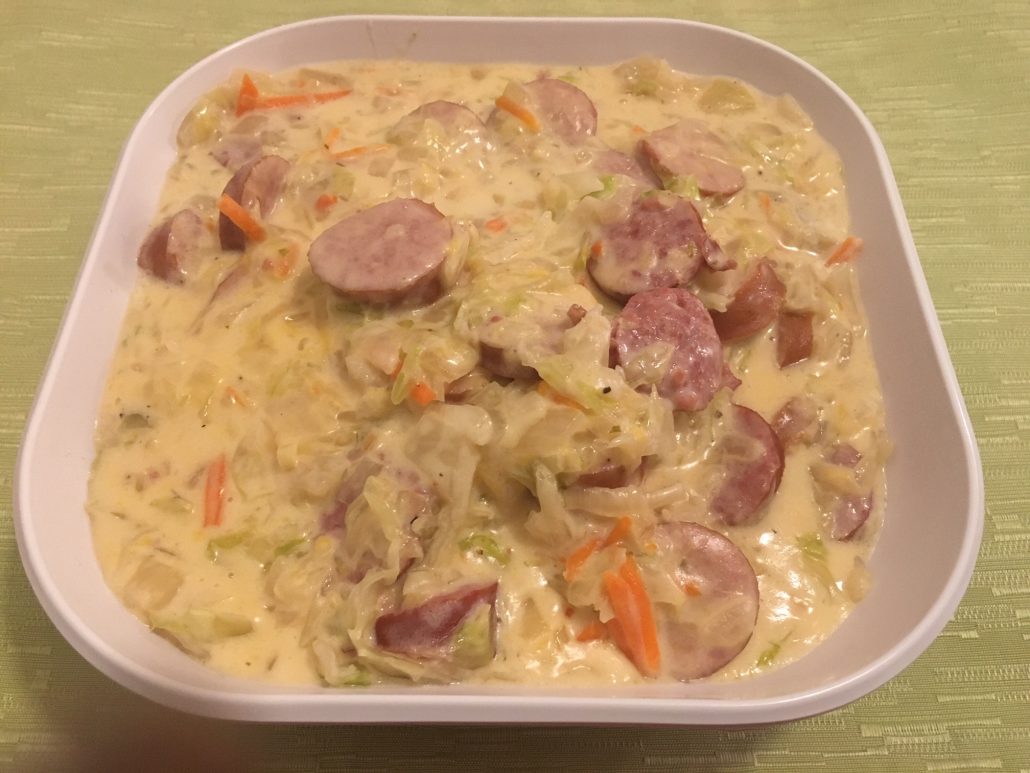
Creamy Cabbage & Kielbasa

Creamy Cabbage & Kielbasa

Print
clock clock iconcutlery cutlery iconflag flag iconfolder folder iconinstagram instagram iconpinterest pinterest iconfacebook facebook iconprint print iconsquares squares iconheart heart iconheart solid heart solid icon
Creamy Cabbage & Kielbasa

Creamy Cabbage & Kielbasa

5 Stars 4 Stars 3 Stars 2 Stars 1 Star No reviews
  • Author: Bryon | Taste & Review
  • Prep Time: 15 min
  • Cook Time: 20 min
  • Total Time: 35 min

Ingredients

Scale

14 ounce classic coleslaw mix with red cabbage and carrots (1 bag)

2 x (14 ounce) Polska Kielbasa

12 ounces Top The Tator Sour Cream (1 container)

2 cup Colby shredded cheese

2 small onions

3 cloves garlic

1 tablespoon butter

2 cup chicken broth

¼ teaspoon salt

¼ teaspoon pepper


Instructions

On a cutting board cut up the onions, garlic, and kielbasa.

In a large frying pan melt the 1 tablespoon of butter on medium low heat. Then add the onion, garlic, and kielbasa. Cook for another 5-6 minutes until the onions are begin to turn brown and somewhat soft.

Then add the coleslaw mix, 2 cups chicken broth, salt and pepper. At this point the shredded cabbage and carrots will be he heaping out of the pan.  As you cook and continually stir it will cook down.

Turn heat up to medium high and cook for 10 minutes. Add the shredded cheese and sour cream. 

Then turn the heat to low stirring till the cheese and sour cream has been completely melted.

Shut off the heat and let creamy cabbage cool and thicken for five minutes. 


Notes

You can substitute the coleslaw mix for 1 small head of cabbage if you want the cabbage to be chunkier.


Nutrition

  • Serving Size: 6
  • Calories: 690
  • Sugar: 15.9g
  • Fat: 37.3g
  • Saturated Fat: 20.1g
  • Carbohydrates: 39.3g
  • Fiber: 1.7g
  • Protein: 46.2g
  • Cholesterol: 197mg
Print
clock clock iconcutlery cutlery iconflag flag iconfolder folder iconinstagram instagram iconpinterest pinterest iconfacebook facebook iconprint print iconsquares squares iconheart heart iconheart solid heart solid icon
Creamy Cabbage & Kielbasa

Creamy Cabbage & Kielbasa

5 Stars 4 Stars 3 Stars 2 Stars 1 Star No reviews
  • Author: Bryon | Taste & Review
  • Prep Time: 15 min
  • Cook Time: 20 min
  • Total Time: 35 min

Ingredients

Scale

14 ounce classic coleslaw mix with red cababbage and carrots (1 bag)
2 x (14 ounce) Polska Kielbasa
12 ounces Top The Tator Sour Cream (1 container)
2 cup Colby shredded cheese
2 small onions
3 cloves garlic
1 tablespoon butter

2 cup chicken broth
¼ teaspoon salt

¼ teaspoon pepper


Instructions

On a cutting board cut up the onions, garlic, and kielbasa.


In a large frying pan melt the 1 tablespoon of butter on medium low heat. Then add the onion, garlic, and kielbasa. Cook for another 5-6 minutes until the onions are begin to turn brown and somewhat soft.


Then add the coleslaw mix, 2 cups chicken broth, salt and pepper. At this point the coleslaw will be he heaping out of the pan but as you cook continually stir and it will cook down.


Turn heat up to medium high and cook for 10 minutes. Add the shredded cheese and sour cream. 


Then turn the heat to low stirring till the cheese and sour cream has been completely melted.


Shut off the heat and let creamy cabbage cool and thicken for five minutes. 


Notes

You can substitute the coleslaw mix for 1 small head of cabbage if you want the cabbage to be chunkier.


Nutrition

  • Serving Size: 6
  • Calories: 690
  • Sugar: 15.9g
  • Fat: 37.3g
  • Saturated Fat: 20.1g
  • Carbohydrates: 39.3g
  • Fiber: 1.7g
  • Protein: 46.2g
  • Cholesterol: 197mg
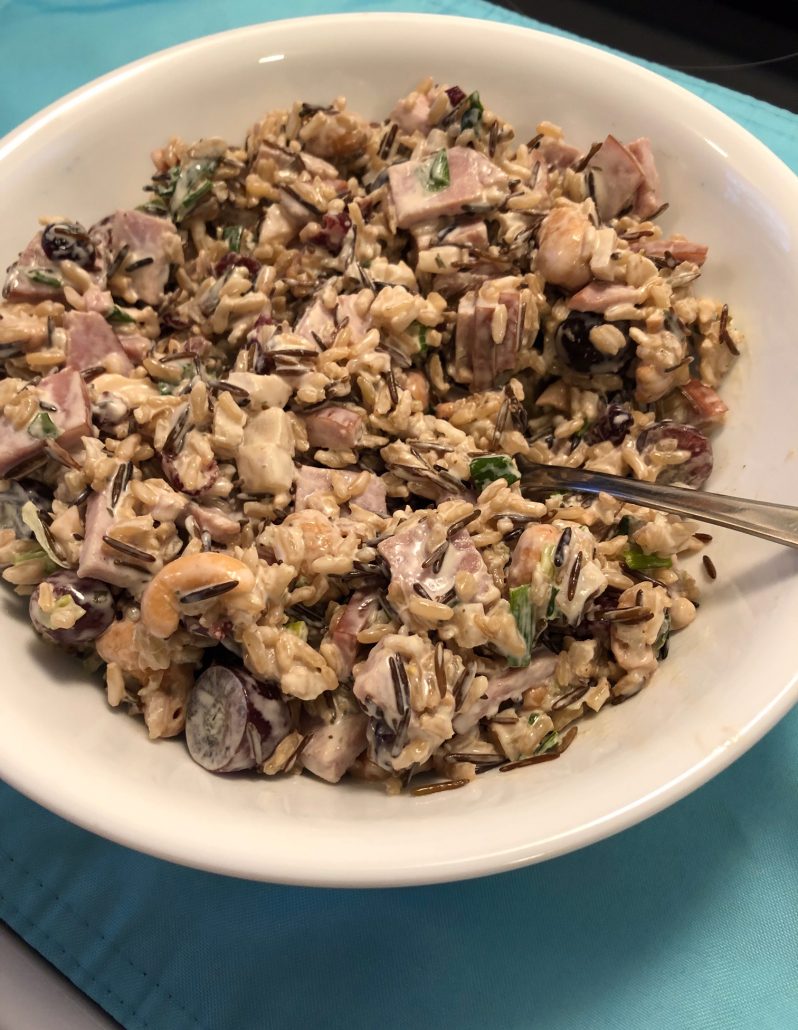
Wild Rice Ham Salad

Wild Rice Ham Salad

Print
clock clock iconcutlery cutlery iconflag flag iconfolder folder iconinstagram instagram iconpinterest pinterest iconfacebook facebook iconprint print iconsquares squares iconheart heart iconheart solid heart solid icon
Wild Rice Ham Salad

Wild Rice Ham Salad

5 Stars 4 Stars 3 Stars 2 Stars 1 Star No reviews
  • Author: Cherie | Taste & Review
  • Prep Time: 20 min
  • Cook Time: 45 min
  • Total Time: 2 hours

Ingredients

Scale

2 cups uncooked wild rice

1 pound ham, cut up into cubes

½ cup thinly sliced green onions

8 ounces (1 can) water chestnuts diced, drained

2 cups seedless red grapes, cut in half

1 cup cashews

1 cup Craisins dried cranberries

½ cup mayonnaise

½ cup whole milk

1 teaspoon lemon juice

¼ teaspoon tarragon

¼ teaspoon salt

¼ teaspoon pepper


Instructions

For this recipe make the wild rice ahead of time. We used a wild rice and brown rice mix. Prepare 2 cups of uncooked rice according to the package instructions.  The wild rice should be cooled before making the salad.

On a cutting board cut up the ham into cubes, red grapes in half, and slice the green onions thinly. Set aside.

In a large bowl make the creamy sauce for the salad. Whisk together the mayonnaise, whole milk, lemon juice, tarragon, salt and pepper.  Stir in the wild rice, ham, grapes, green onions, cashews, craisins, and water chestnuts.

Cover and refrigerate for 1 hour before serving.


Notes

This salad is a great way to use leftover ham. Prepare the wild rice mix ahead of time.  You can serve it plain or put on croissants.


Nutrition

  • Serving Size: 12
  • Calories: 295
  • Sugar: 6.2g
  • Sodium: 626mg
  • Fat: 12.4g
  • Saturated Fat: 2.9g
  • Carbohydrates: 34.1g
  • Fiber: 3.1g
  • Protein: 12.8g
  • Cholesterol: 626mg
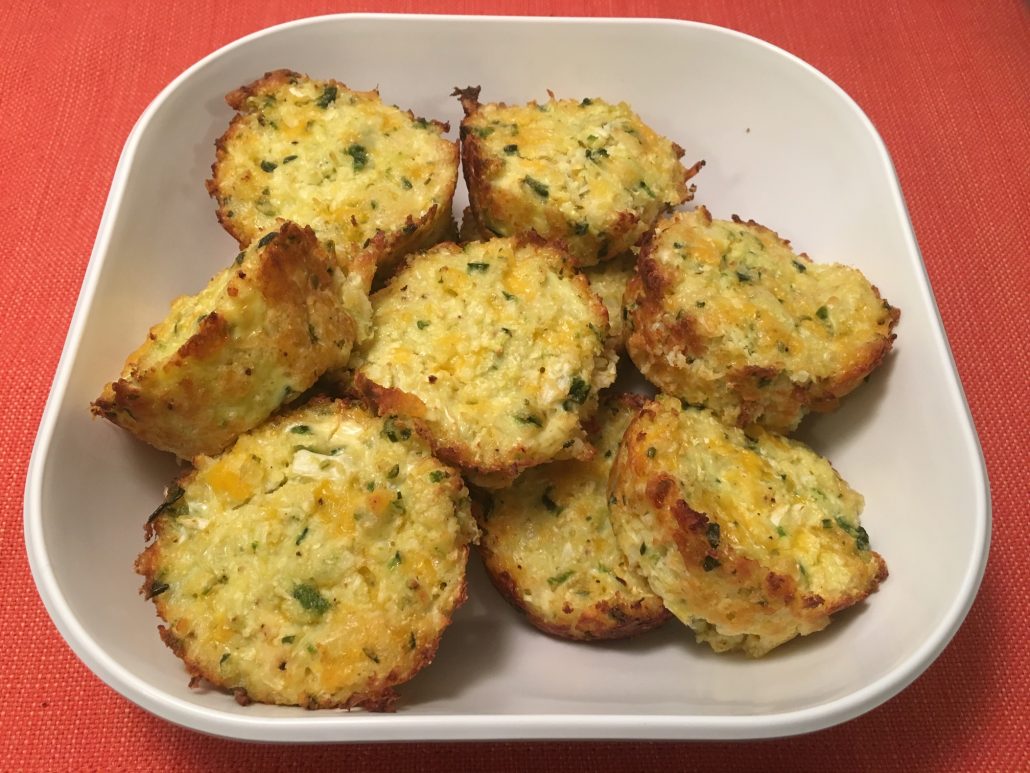
Keto Poblano Cheddar Muffins

Keto Poblano Cheddar Muffins

Print
clock clock iconcutlery cutlery iconflag flag iconfolder folder iconinstagram instagram iconpinterest pinterest iconfacebook facebook iconprint print iconsquares squares iconheart heart iconheart solid heart solid icon
Keto Poblano Cheddar Muffins

Keto Poblano Cheddar Muffins

5 Stars 4 Stars 3 Stars 2 Stars 1 Star No reviews
  • Author: Cherie | Taste & Review
  • Prep Time: 15 min
  • Cook Time: 30min
  • Total Time: 45min

Ingredients

Scale

2 cups riced, raw cauliflower

1 poblano pepper minced

2 large eggs, beaten

2 tablespoons melted butter

2 tablespoons butter or ghee, grease muffin pan

1/3 cup grated parmesan cheese

1 cup grated mozzarella cheese

1 cup grated cheddar cheese

1 tablespoon dried onion flakes

1/4 teaspoon salt

1/4 teaspoon black pepper

1/2 teaspoon garlic powder

1/2 teaspoon baking powder

2 teaspoon dried chives

1/4 cup coconut flour


Instructions

Preheat oven to 350°F. 

Grease a muffin pan with butter or ghee and set aside.

In a large bowl beat 2 eggs. Add 2 tablespoons of melted butter.

Rice the cauliflower with a box grater or food processor. If using the box grater use the medium-sized holes to grate the cauliflower into a rice like texture. Then add the rice cauliflower to the big bowl.

On a cutting board mince the poblano pepper and then add to the big bowl.

Then add the grated parmesan cheese, mozzarella cheese, cheddar cheese, dried onion flakes, salt, black pepper, garlic powder, baking powder, dried chives, and coconut flour. 

Stir till everything is well combined.

Use a spatula and divide the batter into the 12 greased muffin cups.

Bake the poblano cheddar muffins for 30 minutes or until they are golden brown.

Let the muffins cool for one hour before taking out of pan or serving.


Notes

Wear plastic gloves if you have sensitive skin when cutting the poblano pepper. Leftovers can be in the refrigerator for up to one week or three months in the freezer. Don’t use muffin/cupcake liners as they will stick to the paper.


Nutrition

  • Serving Size: 12
  • Calories: 135
  • Sugar: .7g
  • Sodium: 221mg
  • Fat: 9.7g
  • Saturated Fat: 5.9g
  • Carbohydrates: 5.4g
  • Fiber: 2.7g
  • Protein: 6.6g
  • Cholesterol: 56mg
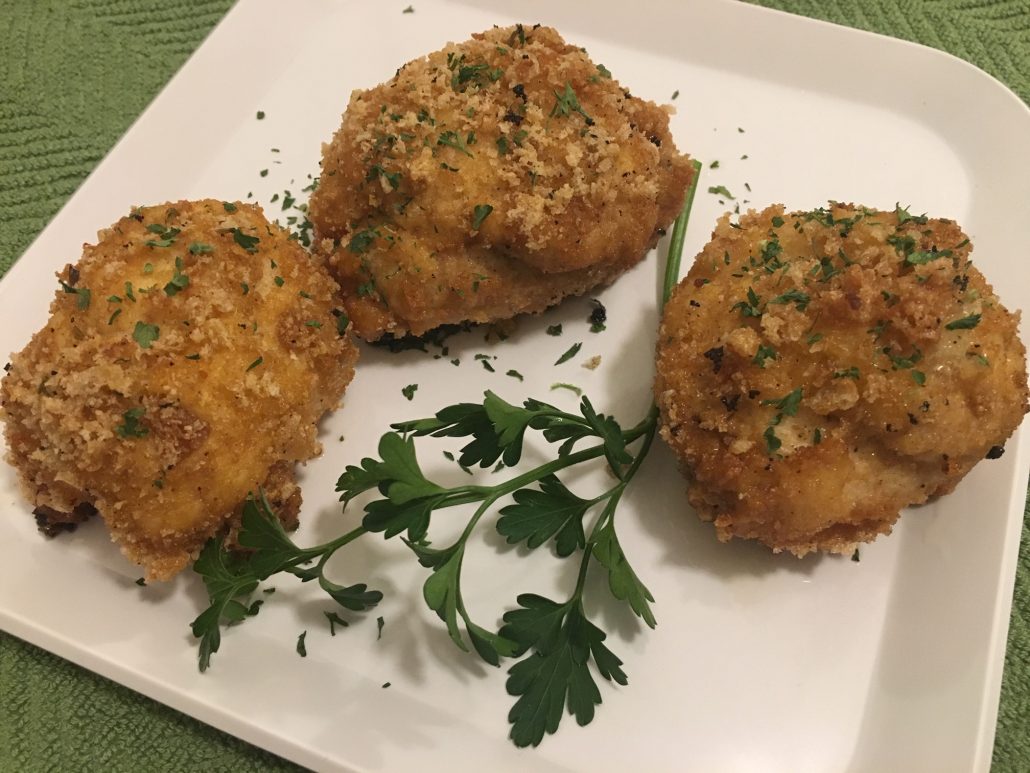
Low Carb Chicken Kiev

Low Carb Chicken Kiev

Print
clock clock iconcutlery cutlery iconflag flag iconfolder folder iconinstagram instagram iconpinterest pinterest iconfacebook facebook iconprint print iconsquares squares iconheart heart iconheart solid heart solid icon
Low Carb Chicken Kiev

Low Carb Chicken Kiev

5 Stars 4 Stars 3 Stars 2 Stars 1 Star No reviews
  • Author: Bryon | Taste & Review
  • Prep Time: 30
  • Total Time: 50

Ingredients

Scale
  • 6 large (8-oz) boneless skinless chicken breasts
  • Avocado oil for frying

Herb Butter filling

  • 9 tablespoon butter, room temperature
  • 6 garlic cloves, minced
  • 1 tablespoon fresh chives, minced
  • 1 tablespoon tarragon
  • 1 tablespoon fresh parsley, plus more for garnish
  • 1/2 teaspoon salt

Breading

  • 3/4 cup almond flour
  • 3/4 cup coconut flour
  • 3.25 oz pork rinds, crumbled
  • 2 eggs

Instructions

Prepare The Herb Garlic Butter Filling

  1. In a small bowl mix together with a fork the butter, minced cloves, mined chives, tarragon, fresh parsley, and salt. Cover and put in freezer for 30 minutes.

Prepare The Chicken

  1. Flatten each chicken breast using plastic wrap on top of each breast. Take a meat mallet and pound it till all the pieces are of the same even thickness. Make sure it is going to be thin enough so later on when you add a filling to it you will be able to wrap it. When the butter has chilled for half hour take it out. Take out plastic wrap and place the pounded chicken breast on it. Then use a tablespoon to scoop out the herb garlic butter filling and place in the middle of the chicken. Use more or less needed depending on each size of the chicken breast. Fold all the chicken to the center. Then take the plastic wrap gather it and cover it. Make sure it is nice and tight. Twist the plastic wrap at the top. It will look like a giant teardrop. Then repeat this pattern till all the chicken is done. Place on a plate and put in the freezer for 40 minutes. Chicken will cold but not frozen. You can prepare the breading while it is in the freezer.

Bread The Chicken Kiev

  1. After the chicken has been in the freezer for 40 minutes take it out. Take a small bowl and 2 medium size bowls out. Place the 2 eggs in the small bowl and beat the eggs. In a medium size bowl add the almond flour and coconut flour. Use a fork and mix the flours till well combined. In another medium size bowl add the crushed pork rinds.
  2. Dip chicken in almond and coconut flour mixture first. Then dip in the beaten eggs followed by dipping it into the crushed pork rinds. Place all the breaded chicken on a plate. Freeze for 15 min before frying.

Cook The Chicken Kiev

  1. Heat up your oil for frying in a deep fryer and follow the manufacturer’s instructions for how much oil to add. We used avocado oil for this recipe. Make sure you don’t fill it to the top so you don’t get hurt. You can also preheat the oven at this time to 400º F and line a baking sheet with parchment paper.
  2. When the deep fryer is up to temperature and the chicken has been chilled for 15 minutes you can now fry it about 1-2 minutes or until lightly golden. Take the chicken out and place on the lined baking sheet. Repeat this till all the chicken has been deep fried.
  3. Put the chicken in the oven and cook for 15 minutes or until golden brown. Let it cool for 5 minutes before serving. Sprinkle fresh parsley on top for garnish.

Notes

  • This recipe is time consuming but worth the effort! Great for a date night of cooking together on the weekend.

Nutrition

  • Serving Size: 6
  • Calories: 489
  • Sugar: 0
  • Sodium: 263
  • Fat: 36
  • Saturated Fat: 14
  • Unsaturated Fat: 19
  • Trans Fat: 1
  • Carbohydrates: 22
  • Protein: 22
  • Cholesterol: 153
Low Carb Mini Raspberry Cheesecakes

Low Carb Raspberry Swirled Cheesecakes

Print
clock clock iconcutlery cutlery iconflag flag iconfolder folder iconinstagram instagram iconpinterest pinterest iconfacebook facebook iconprint print iconsquares squares iconheart heart iconheart solid heart solid icon
Low Carb Raspberry swirled Cheesecakes

Low Carb Raspberry Swirled Cheesecakes

5 Stars 4 Stars 3 Stars 2 Stars 1 Star No reviews
  • Author: Cherie | Taste & Review
  • Prep Time: 20
  • Cook Time: 20
  • Total Time: 40

Ingredients

Scale

Crust Layer

  • 1 1/2 cups bob’s red Mill superfine natural almond flour from whole almonds
  • 6 tablespoons butter ( 1 stick)
  • 1/2 teaspoon cinnamon
  • 1/2 tablespoon Swerve granular sugar

Cheesecake Layer

  • 3 (8 oz) cream cheese, room temperature
  • 3 large eggs
  • 1 1/2 teaspoon vanilla extract
  • 1 1/2 teaspoon lemon juice
  • 1/4 teaspoon Himalayan salt
  • 3/4 cup Swerve granular sugar
  • 3/4 cup sugar-free red raspberry preserves
  • 48 fresh raspberries

Instructions

To Make The Crust Layer

  1. Preheat the oven to 350°F. Line your muffin pan with cupcake liners. This will make 3 dozen or
  2. 48 cheesecakes.
  3. Melt the one stick of butter in a microwave bowl till it is completed melted.
  4. Transfer the melted butter to a medium size bowl. Then add in the almond flour, cinnamon, and Swerve granular sugar.
  5. Use a fork and stir till well combined.
  6. Take a teaspoon and scoop out the crust mixture and press it into the bottom of a muffin tin. Repeat this till all the muffin tins have the crust mixture in them.
  7. Bake in the oven for 5 minutes. The crust layers should be slight brown at this moment and crispy. Let them cool off while you make the cheese cake batter.

To Make The Cheescake Layer

  1. Beat the cream cheese with an electric hand mixer or standing mixer until it is creamy.
  2. Add in the vanilla extract, lemon, eggs, salt, and Swerve granular sugar. Beat until mixture is combined.
  3. Divide mixture evenly among cups over almond crust layer. Each should be fill about ¾ of the way up to reserve room for when it rises in the oven.
  4. Use a teaspoon of sugar-free red raspberry preserves and place on each cheesecake. Keep going till
  5. all the cheesecakes have the jam on top. Then use a tooth pick or fork and swirl it in the batter to create a marble effect.
  6. Bake in the oven at 350°F for 15 minutes. The raspberry cheesecakes will be slightly wiggly. Let them cool in refrigerator for 24 hours.
  7. Place one raspberry on each cheesecake to decorate before serving.


Nutrition

  • Serving Size: 48
  • Calories: 113
  • Sugar: 6
  • Sodium: 64
  • Fat: 8
  • Saturated Fat: 4
  • Unsaturated Fat: 3
  • Trans Fat: 0
  • Carbohydrates: 10
  • Protein: 2
  • Cholesterol: 31
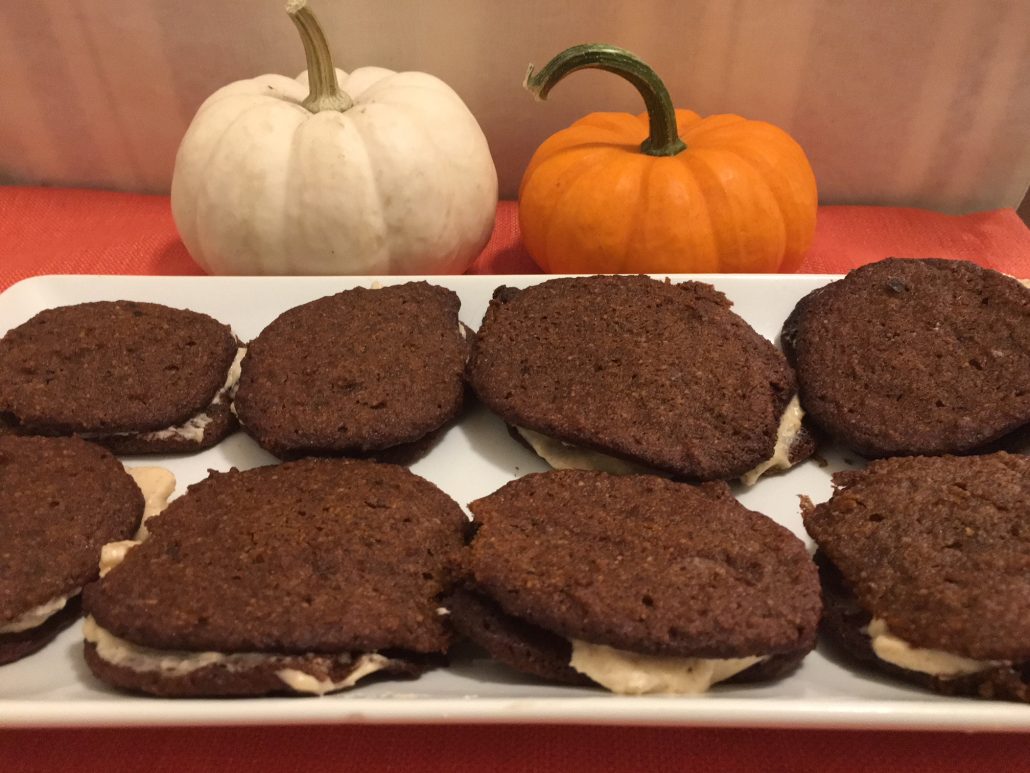
Low Carb Pumpkin Cream Pie Cookies

Low Carb Pumpkin Cream Pie Cookies

Print
clock clock iconcutlery cutlery iconflag flag iconfolder folder iconinstagram instagram iconpinterest pinterest iconfacebook facebook iconprint print iconsquares squares iconheart heart iconheart solid heart solid icon
Low Carb Pumpkin Cream Pie Cookies

Low Carb Pumpkin Cream Pie Cookies

5 Stars 4 Stars 3 Stars 2 Stars 1 Star No reviews
  • Author: Cherie | Taste & Review
  • Prep Time: 20
  • Cook Time: 15
  • Total Time: 180

Ingredients

Scale

For The Cookie

  • 1/2 cup butter (1 stick), softened
  • 2/3 cup Splenda brown sugar blend
  • 1/3 cup Swerve, The Ultimate Sugar Replacement, Granular
  • 2 Large eggs
  • 1 cup Libby 100% pure pumpkin
  • 1 1/2 cup almond flour
  • 2 teaspoon baking powder
  • 1 teaspoon salt
  • 2 teaspoon ground cinnamon
  • 1/2 teaspoon nutmeg
  • 1/4 teaspoon ground ginger
  • 1/4 teaspoon ground clove

For The Cream Filling

  • 1/2 cup butter (1 stick), softened
  • 1 (8 oz) cream cheese, softened
  • 1 2/3 cup Swerve, The Ultimate Sugar Replacement – Confectioners
  • 1 teaspoon vanilla extract
  • 1 teaspoon ground cinnamon
  • 1/4 cup Smucker’s sundae syrup sugar free caramel

Instructions

For The Pumpkin Cookies

  1. Preheat your oven to 350ºF.
  2. Line 3 baking trays with parchment paper
  3. Cream the butter, and the sugars in a mixer. Add in the 2 eggs and pumpkin. Mix well till is all combined.
  4. Then add in the almond flour, baking powder, salt, ground cinnamon, nutmeg, ground ginger, and ground clove. Mix for another 2 minutes.
  5. Set the mixing bowl with the pumpkin dough in the refrigerator and chill for an hour or overnight. While the dough is in the fridge you can make the cream filling.
  6. Take out the refrigerated dough after it has been chilled, and using teaspoon scoop out the pumpkin batter and place dough on the prepared parchment paper baking tray. Allow them plenty of space for the cookie to spread. It should make about 36 cookies or 3 dozen that will be used to make the cookies. 36 cookie halves to make up 18 total finished.
  7. Bake the cookies for 12-15 minutes.
  8. Cookies will be super soft so allow 30 minutes or more to cool before frosting them.

For The Cream Filling

  1. In a mixing bowl cream the butter, and cream cheese together. Then add the swerve sugar, vanilla extract, ground cinnamon, and caramel syrup. Mix until well combined.

To Assemble The Cookies

  1. Match up two cookies that are similar in size. Turn the bottoms over and using a knife to spread it on both halves. If desired you can pipe the filling on with a piping bag or a zip bag with the corner cut off. Add the top cookie and press down to make it sandwhiched.
  2. Place in a tupperware container and let them cool for 1 to 2 hours before serving.

Notes

  • Dough will be super soft and chewy. The key to this recipe is giving enough time for the cookies to cool before frosting and before serving.

Nutrition

  • Serving Size: 18
  • Calories: 302
  • Sugar: 26
  • Sodium: 185
  • Fat: 18
  • Saturated Fat: 10
  • Unsaturated Fat: 7
  • Trans Fat: 0
  • Carbohydrates: 34
  • Protein: 3
  • Cholesterol: 62