Posts

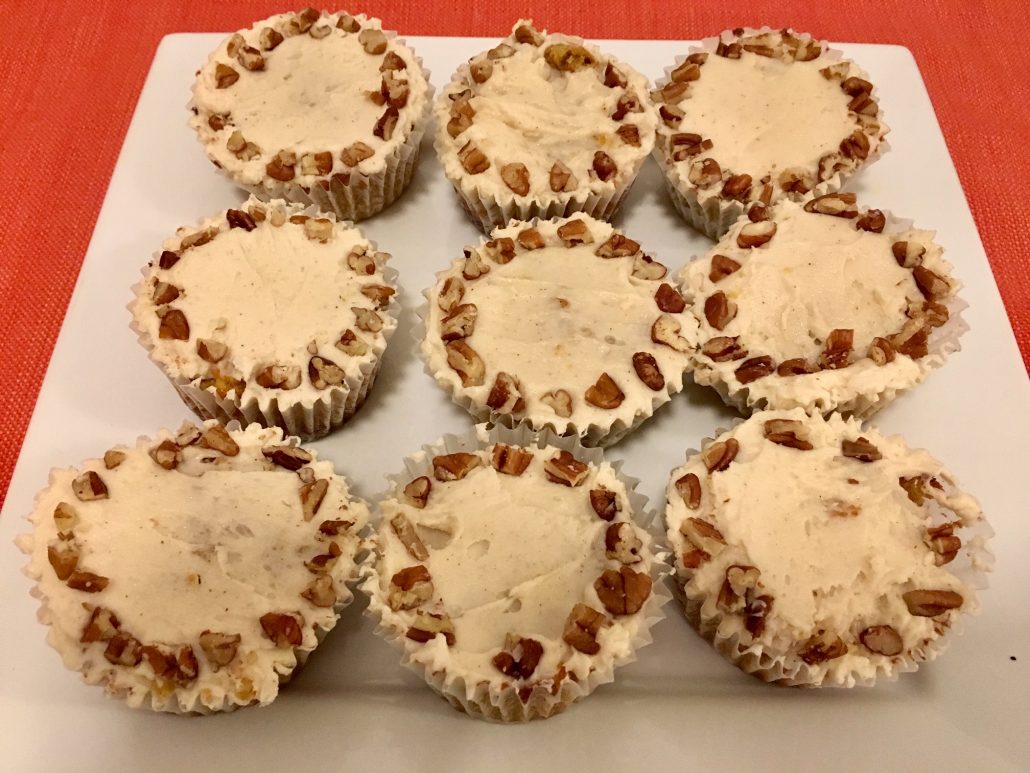
Low Carb Carrot Cake Cupcakes

Low Carb Carrot Cake Cupcakes

Print
clock clock iconcutlery cutlery iconflag flag iconfolder folder iconinstagram instagram iconpinterest pinterest iconfacebook facebook iconprint print iconsquares squares iconheart heart iconheart solid heart solid icon
Low Carb Carrot Cake Cupcakes

Low Carb Carrot Cake Cupcakes

5 Stars 4 Stars 3 Stars 2 Stars 1 Star No reviews
  • Author: Cherie | Taste & Review
  • Prep Time: 15 min
  • Cook Time: 20 min
  • Total Time: 35 min

Ingredients

Scale

Carrot Cake Cupcakes Ingredients:

¼ cup Swerve granular

½ cup Swerve brown sugar replacement

¾ cup butter, unsalted (room temperature)

1 teaspoon vanilla extract

4 large eggs

2 ½ cups, Finely ground almond flour

2 teaspoons baking powder

2 teaspoons ground cinnamon

¼ teaspoon ground nutmeg

6 ounces shredded carrot

1 cup unsweetened coconut flakes

2 cups pecans chopped

Cream Cheese Frosting Ingredients:

8 ounce cream cheese (room temperature)

½ cup butter, unsalted (room temperature)

1 teaspoon vanilla extract

½ teaspoon cinnamon

¼ teaspoon salt

3 ½ cups Swerve confectioners


Instructions

Preparation:

For this recipe the cream cheese and unsalted butter need to be at room temperature.

Set them both aside and let them get to room temperature before preparing the recipe.

You can also take the pecans and chop them up and set them aside as well.

Make The Carrot Cake Cupcakes:

Preheat oven to 350ºF degrees. Line your cupcake pans with cupcake paper liners. This recipe make 18 cupcakes. 

In a mixing bowl combine the Swerve granular, Swerve brown sugar replacement, and unsalted butter. Beat them together till it is creamed and well combined.

Add vanilla extract, and eggs. Keep beating the mixture till combined.

In a separate medium size bowl add the ground almond flour, baking powder, cinnamon, and nutmeg.

Take a fork and mix the dry ingredients till they are well combined.

Gradually add the dry ingredients to the wet mixture and beat it slowly till everything is combined.

Fold in the shredded carrots, unsweetened coconut flakes, and 1 ½ cups of pecans.

Reserve the remaining ½ cup pecans for decorating on top of the cupcakes.

Evenly divide the batter between the muffin liners. Each carrot cake cupcake batter should be just below the top of the cupcake liner.

Place the cupcakes in the oven and bake for 20-25 minutes or until a toothpick comes out clean inserted in the center.

Cool cupcakes for an hour before frosting and decorating them.

Make The Cream Cheese Frosting:

In a mixing bowl add the cream cheese and butter. Whip together till fluffy and creamy. Then add the vanilla extract, cinnamon, salt, and Swerve confectioners. Keep beating till it is well combined.

Decorate The Carrot Cake Cupcakes:

Use a butter knife to frost the cupcakes. Place the remaining pecans and decorate around the edges on top of the frosting. To make it look more fancy you can always pipe up the frosting.


Notes

This recipe makes extra frosting than needed. For best results have the cream cheese and unsalted butter at room temperature. 


Nutrition

  • Serving Size: 18
  • Calories: 338
  • Sugar: 35g
  • Fat: 34.3g
  • Saturated Fat: 16.2g
  • Carbohydrates: 8g
  • Fiber: 2g
  • Protein: 7g
  • Cholesterol: 92mg
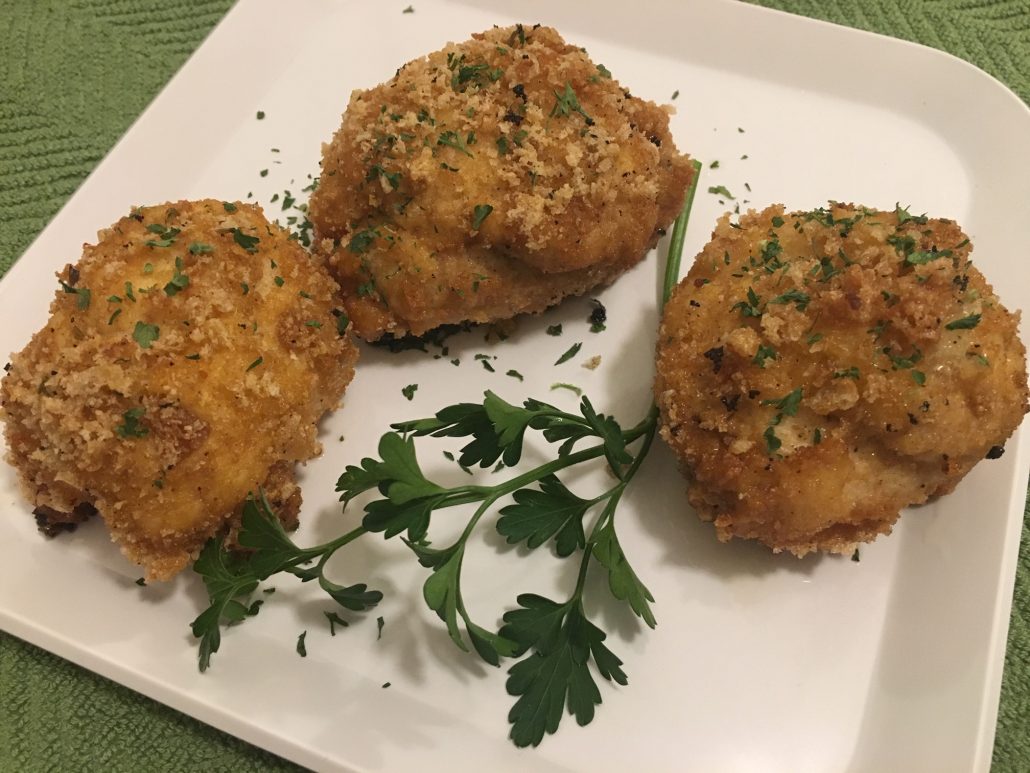
Low Carb Chicken Kiev

Low Carb Chicken Kiev

Print
clock clock iconcutlery cutlery iconflag flag iconfolder folder iconinstagram instagram iconpinterest pinterest iconfacebook facebook iconprint print iconsquares squares iconheart heart iconheart solid heart solid icon
Low Carb Chicken Kiev

Low Carb Chicken Kiev

5 Stars 4 Stars 3 Stars 2 Stars 1 Star No reviews
  • Author: Bryon | Taste & Review
  • Prep Time: 30
  • Total Time: 50

Ingredients

Scale
  • 6 large (8-oz) boneless skinless chicken breasts
  • Avocado oil for frying

Herb Butter filling

  • 9 tablespoon butter, room temperature
  • 6 garlic cloves, minced
  • 1 tablespoon fresh chives, minced
  • 1 tablespoon tarragon
  • 1 tablespoon fresh parsley, plus more for garnish
  • 1/2 teaspoon salt

Breading

  • 3/4 cup almond flour
  • 3/4 cup coconut flour
  • 3.25 oz pork rinds, crumbled
  • 2 eggs

Instructions

Prepare The Herb Garlic Butter Filling

  1. In a small bowl mix together with a fork the butter, minced cloves, mined chives, tarragon, fresh parsley, and salt. Cover and put in freezer for 30 minutes.

Prepare The Chicken

  1. Flatten each chicken breast using plastic wrap on top of each breast. Take a meat mallet and pound it till all the pieces are of the same even thickness. Make sure it is going to be thin enough so later on when you add a filling to it you will be able to wrap it. When the butter has chilled for half hour take it out. Take out plastic wrap and place the pounded chicken breast on it. Then use a tablespoon to scoop out the herb garlic butter filling and place in the middle of the chicken. Use more or less needed depending on each size of the chicken breast. Fold all the chicken to the center. Then take the plastic wrap gather it and cover it. Make sure it is nice and tight. Twist the plastic wrap at the top. It will look like a giant teardrop. Then repeat this pattern till all the chicken is done. Place on a plate and put in the freezer for 40 minutes. Chicken will cold but not frozen. You can prepare the breading while it is in the freezer.

Bread The Chicken Kiev

  1. After the chicken has been in the freezer for 40 minutes take it out. Take a small bowl and 2 medium size bowls out. Place the 2 eggs in the small bowl and beat the eggs. In a medium size bowl add the almond flour and coconut flour. Use a fork and mix the flours till well combined. In another medium size bowl add the crushed pork rinds.
  2. Dip chicken in almond and coconut flour mixture first. Then dip in the beaten eggs followed by dipping it into the crushed pork rinds. Place all the breaded chicken on a plate. Freeze for 15 min before frying.

Cook The Chicken Kiev

  1. Heat up your oil for frying in a deep fryer and follow the manufacturer’s instructions for how much oil to add. We used avocado oil for this recipe. Make sure you don’t fill it to the top so you don’t get hurt. You can also preheat the oven at this time to 400º F and line a baking sheet with parchment paper.
  2. When the deep fryer is up to temperature and the chicken has been chilled for 15 minutes you can now fry it about 1-2 minutes or until lightly golden. Take the chicken out and place on the lined baking sheet. Repeat this till all the chicken has been deep fried.
  3. Put the chicken in the oven and cook for 15 minutes or until golden brown. Let it cool for 5 minutes before serving. Sprinkle fresh parsley on top for garnish.

Notes

  • This recipe is time consuming but worth the effort! Great for a date night of cooking together on the weekend.

Nutrition

  • Serving Size: 6
  • Calories: 489
  • Sugar: 0
  • Sodium: 263
  • Fat: 36
  • Saturated Fat: 14
  • Unsaturated Fat: 19
  • Trans Fat: 1
  • Carbohydrates: 22
  • Protein: 22
  • Cholesterol: 153
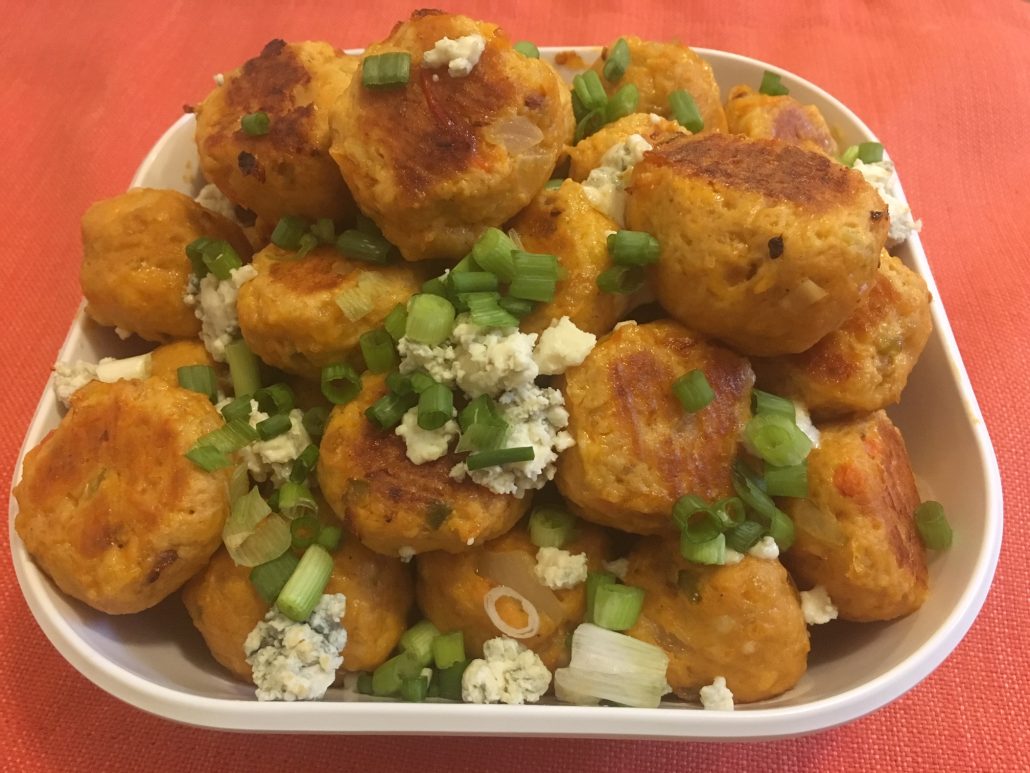
Low Carb Buffalo Chicken Meatballs

Low Carb Buffalo Chicken Meatballs

Print
clock clock iconcutlery cutlery iconflag flag iconfolder folder iconinstagram instagram iconpinterest pinterest iconfacebook facebook iconprint print iconsquares squares iconheart heart iconheart solid heart solid icon
Low Carb Buffalo Chicken Meatballs

Low Carb Buffalo Chicken Meatballs

5 Stars 4 Stars 3 Stars 2 Stars 1 Star No reviews
  • Author: Cherie | Taste & Review
  • Prep Time: 30
  • Cook Time: 15
  • Total Time: 45

Ingredients

Scale

Buffalo Chicken Meatballs

  • 1 pound ground chicken
  • 1/3 cup almond flour
  • 2 garlic cloves, minced
  • 1/2 onion, minced
  • 1 celery stalk, chopped
  • ½ red pepper, finely diced
  • 1 egg, beaten
  • 2 cups shredded cheddar cheese
  • 1 cup crushed pork rinds
  • ½ cup Frank’s redhot wings buffalo sauce
  • 2 tablespoons, unsalted butter melted

Garnish & Toppings

  • 5 oz crumbled blue cheese
  • 2 green onions, finely chopped

Instructions

  1. This recipe makes about 2 dozen meatballs.
  2. Preheat the oven to 400ºF. Line 2 baking sheets with parchment paper.
  3. In a large frying pan, heat two tablespoons of butter until melted and hot. Add the minced garlic, minced onions, chopped celery, and finely diced red pepper. Saute the vegetables until soft and onions are translucent.
  4. In a large mixing bowl add all the buffalo chicken meatballs ingredients including the sauteed vegetables. Then using your hands and fingers mix the buffalo chicken meatball mixture. Don’t over mix into a paste.
  5. Keep your hands oiled so the meatball mixture won’t stick to your hands. Then use a tablespoon size scoop or spoon to gently form the meatballs. Use your hands and fingers to roll the meat mixture into balls. Place the meatballs onto the parchment paper lined sheet. Keep going till all the meatball mixture is used.
  6. Bake the meatballs for 15 minutes or until the center has reached 160ºF. Serve the buffalo chicken meatballs on a plate and garnish with crumbled blue cheese and green onions.

Notes

  • Serve with celery sticks and bleu cheese dressing. If desired add more hot sauce on top of meatballs.

Nutrition

  • Serving Size: 24
  • Calories: 119
  • Sugar: 0
  • Sodium: 164
  • Fat: 9
  • Saturated Fat: 4
  • Unsaturated Fat: 4
  • Trans Fat: 0
  • Carbohydrates: 2
  • Protein: 9
  • Cholesterol: 46
Low Carb Mini Raspberry Cheesecakes

Low Carb Raspberry Swirled Cheesecakes

Print
clock clock iconcutlery cutlery iconflag flag iconfolder folder iconinstagram instagram iconpinterest pinterest iconfacebook facebook iconprint print iconsquares squares iconheart heart iconheart solid heart solid icon
Low Carb Raspberry swirled Cheesecakes

Low Carb Raspberry Swirled Cheesecakes

5 Stars 4 Stars 3 Stars 2 Stars 1 Star No reviews
  • Author: Cherie | Taste & Review
  • Prep Time: 20
  • Cook Time: 20
  • Total Time: 40

Ingredients

Scale

Crust Layer

  • 1 1/2 cups bob’s red Mill superfine natural almond flour from whole almonds
  • 6 tablespoons butter ( 1 stick)
  • 1/2 teaspoon cinnamon
  • 1/2 tablespoon Swerve granular sugar

Cheesecake Layer

  • 3 (8 oz) cream cheese, room temperature
  • 3 large eggs
  • 1 1/2 teaspoon vanilla extract
  • 1 1/2 teaspoon lemon juice
  • 1/4 teaspoon Himalayan salt
  • 3/4 cup Swerve granular sugar
  • 3/4 cup sugar-free red raspberry preserves
  • 48 fresh raspberries

Instructions

To Make The Crust Layer

  1. Preheat the oven to 350°F. Line your muffin pan with cupcake liners. This will make 3 dozen or
  2. 48 cheesecakes.
  3. Melt the one stick of butter in a microwave bowl till it is completed melted.
  4. Transfer the melted butter to a medium size bowl. Then add in the almond flour, cinnamon, and Swerve granular sugar.
  5. Use a fork and stir till well combined.
  6. Take a teaspoon and scoop out the crust mixture and press it into the bottom of a muffin tin. Repeat this till all the muffin tins have the crust mixture in them.
  7. Bake in the oven for 5 minutes. The crust layers should be slight brown at this moment and crispy. Let them cool off while you make the cheese cake batter.

To Make The Cheescake Layer

  1. Beat the cream cheese with an electric hand mixer or standing mixer until it is creamy.
  2. Add in the vanilla extract, lemon, eggs, salt, and Swerve granular sugar. Beat until mixture is combined.
  3. Divide mixture evenly among cups over almond crust layer. Each should be fill about ¾ of the way up to reserve room for when it rises in the oven.
  4. Use a teaspoon of sugar-free red raspberry preserves and place on each cheesecake. Keep going till
  5. all the cheesecakes have the jam on top. Then use a tooth pick or fork and swirl it in the batter to create a marble effect.
  6. Bake in the oven at 350°F for 15 minutes. The raspberry cheesecakes will be slightly wiggly. Let them cool in refrigerator for 24 hours.
  7. Place one raspberry on each cheesecake to decorate before serving.


Nutrition

  • Serving Size: 48
  • Calories: 113
  • Sugar: 6
  • Sodium: 64
  • Fat: 8
  • Saturated Fat: 4
  • Unsaturated Fat: 3
  • Trans Fat: 0
  • Carbohydrates: 10
  • Protein: 2
  • Cholesterol: 31
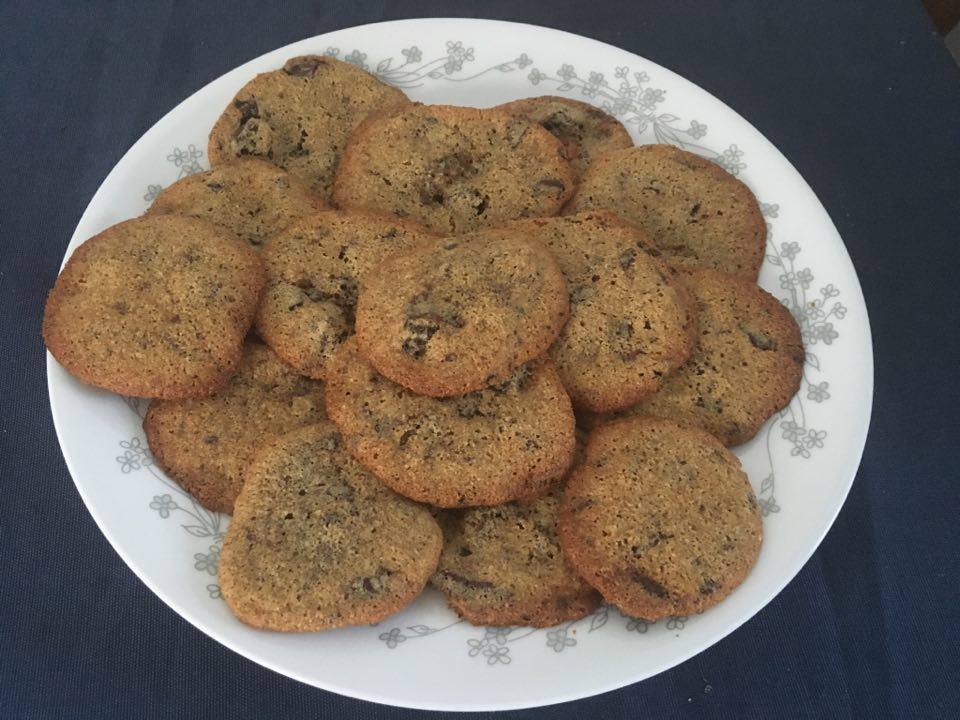
Low Carb Soft and Chewy Chocolate Chip Cookies

Low Carb Soft and Chewy Chocolate Chip Cookies

Print
clock clock iconcutlery cutlery iconflag flag iconfolder folder iconinstagram instagram iconpinterest pinterest iconfacebook facebook iconprint print iconsquares squares iconheart heart iconheart solid heart solid icon

Low Carb Soft and Chewy Chocolate Chip Cookies

5 Stars 4 Stars 3 Stars 2 Stars 1 Star No reviews
  • Author: Cherie DeBrule

Ingredients

Scale
  • 2 1/4 cup Almond flour
  • 1/2 teaspoon baking soda
  • 1 cup (2 sticks) unsalted butter, room temperature
  • 1/2 cup Splenda
  • 1 cup packed Splenda brown sugar
  • 1 teaspoon salt
  • 2 teaspoons pure vanilla extract
  • 2 large eggs
  • 2 cups of sugar free chocolate

Instructions

  1. 1. Preheat oven to 350ºF degrees. In a small bowl, whisk together the almond flour and baking soda; set aside. In the bowl of an electric mixer fitted with the paddle attachment, combine the butter with both sugars; beat on medium speed until light and fluffy. Reduce speed to low; add the salt, vanilla, and eggs. Beat until well mixed, about 1 minute. Add almond flour mixture; mix until just combined. Chop up the sugar free chocolate. Stir in the sugar free chocolate.
  2. 2.Drop teaspoons-size balls of dough about 2 inches apart on baking sheets lined with parchment paper.
  3. 3.Bake until cookies are golden around the edges, but still soft in the center, 8 to 10 minutes. Remove from oven, and let cool on baking sheet 1 to 2 minutes. Transfer to a wire rack, and let cool completely. Store cookies in an airtight container at room temperature up to 1 week.


Nutrition

  • Serving Size: 36
  • Calories: 156
  • Sugar: 17
  • Sodium: 89
  • Fat: 8
  • Saturated Fat: 4
  • Unsaturated Fat: 4
  • Trans Fat: 0
  • Carbohydrates: 22
  • Protein: 1
  • Cholesterol: 24